На сайте 123390 инструкций общим размером 499.31 Гб , которые состоят из 6234587 страниц
Фото

Руководство пользователя ROLAND SPD-30 Octaped. Основные функции, характеристики и условия эксплуатации изложены на 80 страницах документа в pdf формате.
Доступно к просмотру 77 страниц. Рекомендуем вам скачать файл инструкции, поскольку онлайн просмотр документа может сильно отличаться от оригинала.
For the U.K.
IMPORTANT: THE WIRES IN THIS MAINS LEAD ARE COLOURED IN ACCORDANCE WITH THE FOLLOWING CODE.
BLUE:   NEUTRAL
BROWN:  LIVE
As the colours of the wires in the mains lead of this apparatus may not correspond with the coloured markings identifying
the terminals in your plug, proceed as follows:
The wire which is coloured BLUE must be connected to the terminal which is marked with the letter N or coloured BLACK.
The wire which is coloured BROWN must be connected to the terminal which is marked with the letter L or coloured RED.
Under no circumstances must either of the above wires be connected to the earth terminal of a three pin plug.
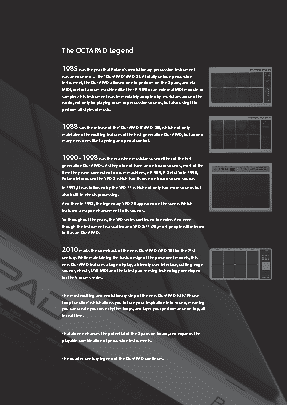
The OCTAPAD Legend
1985 was the year that Roland’s revolutionary percussion instrument
was announced — the “OCTAPAD” (PAD-8). A totally unique percussion
instrument, the OCTAPAD allowed one to perform on the 8 pads, and via
MIDI, control a drum machine (like the TR-909) or an external MIDI module or
sampler. This instrument was immediately adopted by musicians around the
world, not only for playing drum or percussion sounds, but also using it to
perform all styles of music.
1988 saw the release of the “OCTAPAD II” (PAD-80), which not only
maintained the exciting features of the first-generation OCTAPAD, but added
many new ones like Layering and pedal control.
1990–1998 was the era when musicians used either of the first-
generation OCTAPADs. As they did not have an on-board sounds, most of the
time they were connected to drum machines, (TR-909, R-8 etc) So In 1990,
Roland introduced the SPD-8 which had its own on-board sound source.
In 1993, It was followed by the SPD-11 which not only had more sounds but
also built-in effects processing.
And then in 1998, the legendary SPD-20 appeared on the scene. Which
featured a major enhancement to its sounds.
So throughout the years, the SPD series continued to evolve. And even
though the instrument was called and SPD-8/11/20, most people will referred
to it as an OCTAPAD.
2010 marks the comeback of the new OCTAPAD (SPD-30) for the 21st
century. While maintaining the basic design of the precedent models, this
new OCTAPAD features a large display, a friendly user interface, cutting-edge
sounds, effects, USB MIDI and the latest pad sensing technology developed
for the V-drums series.
The most exciting and evolutionary step of the new OCTAPAD is its “Phrase
Loop function” which allows you to turn your inspiration into sound; meaning
you can create your own rhythm loops, and layer your performance on top, all
in real time.
That alone enhances the potential of the 8 pads on board, and expands the
playable combination of percussion instruments.
The quarter-century legend of the OCTAPAD continues.
Contents
Turning the Power On/Off   .  .  .  .  .  .  .  .  .  .  .  .  .  .  .  .  .  .  .  .  .  .  .6  Advance	Operation	1	(Kit)	  30
Overview	                              7      Creating a Kit  .  .  .  .  .  .  .  .  .  .  .  .  .  .  .  .  .  .  .  .  .  .  .  .  .  .  .  .  .  .  .  .  .  .30
Inst Settings (INST) . . . . . . . . . . . . . . . . . . . . . . . . . . . . . . . . . 30
01  Overview of the OCTAPAD   .  .  .  .  .  .  .  .  .  .  .  .  .  .  .  .  .  .  .8
What is an Inst? . . . . . . . . . . . . . . . . . . . . . . . . . . . . . . . . . . 8  Inst and Layer Settings (INST-INST) . . . . . . . . . . . . . . 30
What is a Kit? . . . . . . . . . . . . . . . . . . . . . . . . . . . . . . . . . . . . 8  Editing an Inst (INST-EDIT). . . . . . . . . . . . . . . . . . . . . . . 31
What are Ambience and FX? . . . . . . . . . . . . . . . . . . . . . . 9  Hi-hat Settings (INST-HH CTRL) . . . . . . . . . . . . . . . . . . 32
INST Screen QUICK MENU . . . . . . . . . . . . . . . . . . . . . . . 33
What is a Phrase Loop? . . . . . . . . . . . . . . . . . . . . . . . . . . . 9  Settings for the Entire Kit (KIT OTHERS) . . . . . . . . . . . . . . 34
Editing and Saving Your Data . . . . . . . . . . . . . . . . . . . . . 9
Kit Volume, Tempo, and Protect (KIT OTHERS-KIT) 34
02  Panel Descriptions  .  .  .  .  .  .  .  .  .  .  .  .  .  .  .  .  .  .  .  .  .  .  .  .  .  .10  Phrase Settings Recalled by the Kit
Top Panel . . . . . . . . . . . . . . . . . . . . . . . . . . . . . . . . . . . . . . . . . . 10  (KIT OTHERS-PHRASE) . . . . . . . . . . . . . . . . . . . . . . . . . . . 34
Rear Panel Connections . . . . . . . . . . . . . . . . . . . . . . . . . . . . 12  Assigning a Name (NAME) . . . . . . . . . . . . . . . . . . . . . . . . . . 35
NAME Palette QUICK MENU . . . . . . . . . . . . . . . . . . . . . 35
03  Displays and Operations  .  .  .  .  .  .  .  .  .  .  .  .  .  .  .  .  .  .  .  .14  Copying a Kit or Pad (COPY) . . . . . . . . . . . . . . . . . . . . . . . . 35
KIT Screen  . . . . . . . . . . . . . . . . . . . . . . . . . . . . . . . . . . . . . . . . . 14  Copying a Pad . . . . . . . . . . . . . . . . . . . . . . . . . . . . . . . . . . 35
QUICK MENU Screens  . . . . . . . . . . . . . . . . . . . . . . . . . . . . . . 15  Copying a Kit . . . . . . . . . . . . . . . . . . . . . . . . . . . . . . . . . . . 36
MENU Screen . . . . . . . . . . . . . . . . . . . . . . . . . . . . . . . . . . . . . . 16  Exchanging Pads (PAD EXCHANGE) . . . . . . . . . . . . . . . . . 36
PHRASE LOOP Screen  . . . . . . . . . . . . . . . . . . . . . . . . . . . . . . 18
KIT CHAIN   .  .  .  .  .  .  .  .  .  .  .  .  .  .  .  .  .  .  .  .  .  .  .  .  .  .  .  .  .  .  .  .  .  .  .  .  .37
04  FACTORY RESET   .  .  .  .  .  .  .  .  .  .  .  .  .  .  .  .  .  .  .  .  .  .  .  .  .  .  .  .20  Creating a Kit Chain (KIT CHAIN) . . . . . . . . . . . . . . . . . . . . 37
Basic	Operation	                      21           KIT CHAIN Screen QUICK MENU . . . . . . . . . . . . . . . . . 37
Switching Kit Chains . . . . . . . . . . . . . . . . . . . . . . . . . . . . . . . . 38
01  Selecting a Kit  .  .  .  .  .  .  .  .  .  .  .  .  .  .  .  .  .  .  .  .  .  .  .  .  .  .  .  .  .  .22
[KIT] Buttons . . . . . . . . . . . . . . . . . . . . . . . . . . . . . . . . . . . . . . . 22  Using the Effects (FX)  .  .  .  .  .  .  .  .  .  .  .  .  .  .  .  .  .  .  .  .  .  .  .  .  .  .  .39
KIT LIST . . . . . . . . . . . . . . . . . . . . . . . . . . . . . . . . . . . . . . . . . . . . 22  FX Settings (FX) . . . . . . . . . . . . . . . . . . . . . . . . . . . . . . . . . . . . 39
FAVORITE KITS . . . . . . . . . . . . . . . . . . . . . . . . . . . . . . . . . . . . . . 22  Switching the FX Type (FX-TYPE) . . . . . . . . . . . . . . . . . 39
KIT CHAIN Function . . . . . . . . . . . . . . . . . . . . . . . . . . . . . 22  Editing FX Parameters (FX-EDIT) . . . . . . . . . . . . . . . . . 39
Foot Switch . . . . . . . . . . . . . . . . . . . . . . . . . . . . . . . . . . . . . 22  Setting the FX Send Level for Each Pad (FX-SEND) 40
FX Screen QUICK MENU . . . . . . . . . . . . . . . . . . . . . . . . . 40
02  Selecting an Inst (INST)  .  .  .  .  .  .  .  .  .  .  .  .  .  .  .  .  .  .  .  .  .23  Copying FX Settings . . . . . . . . . . . . . . . . . . . . . . . . . . . . . . . . 40
Using the Knobs to Control the FX (FX CONTROL)  . . . 41
03  MULTI EDIT  .  .  .  .  .  .  .  .  .  .  .  .  .  .  .  .  .  .  .  .  .  .  .  .  .  .  .  .  .  .  .  .  .24
Editing the AMBIENCE  .  .  .  .  .  .  .  .  .  .  .  .  .  .  .  .  .  .  .  .  .  .  .  .  .  .42
04  Effects Editing (AMBIENCE and FX)  .  .  .  .  .  .  .  .  .  .  .25  Ambience Settings (AMBIENCE-AMBIENCE) . . . . . . 42
AMBIENCE . . . . . . . . . . . . . . . . . . . . . . . . . . . . . . . . . . . . . . . . . 25  Equalizer Settings (AMBIENCE-EQ) . . . . . . . . . . . . . . . 42
FX . . . . . . . . . . . . . . . . . . . . . . . . . . . . . . . . . . . . . . . . . . . . . . . . . 25
Limiter Settings (AMBIENCE-LIMIT) . . . . . . . . . . . . . . 42
05  Recording a Phrase Loop (PHRASE LOOP)  .  .  .  .26
Step 1: Select a Kit . . . . . . . . . . . . . . . . . . . . . . . . . . . . . . . . . . 26
Step 2: Make Settings Before Recording . . . . . . . . . . . . . 26
Step 3: Recording . . . . . . . . . . . . . . . . . . . . . . . . . . . . . . . . . . 27
Re-doing the Recording . . . . . . . . . . . . . . . . . . . . . . . . . . . . 28
Erasing a Track (ERASE) . . . . . . . . . . . . . . . . . . . . . . . . . . 28
Undoing a Recording (UNDO) . . . . . . . . . . . . . . . . . . . 28
Clearing the Phrase (CLEAR PHRASE)  . . . . . . . . . . . . 28
Saving the Phrase (SAVE PHRASE) . . . . . . . . . . . . . . . . . . . 28
Exiting Phrase Loop Mode . . . . . . . . . . . . . . . . . . . . . . . . . . 28
Copyright © 2010 ROLAND CORPORATION
All rights reserved. No part of this publication may be reproduced in any form without the written permission of ROLAND CORPORATION.
Before using the OCTAPAD, carefully read the sections entitled: “USING THE UNIT SAFELY” (p. 72) and “IMPORTANT NOTES” (p. 73). These sections provide important
information concerning the proper operation of the OCTAPAD. Additionally, in order to feel assured that you have gained a good grasp of every feature provided by your
new unit, Owner’s Manual should be read in its entirety. The manual should be saved and kept on hand as a convenient reference.
4