На сайте 123434 инструкции общим размером 499.46 Гб , которые состоят из 6236200 страниц
Фото


Руководство пользователя IBANEZ TN120. Основные функции, характеристики и условия эксплуатации изложены на 32 страницах документа в pdf формате.
Доступно к просмотру 30 страниц. Рекомендуем вам скачать файл инструкции, поскольку онлайн просмотр документа может сильно отличаться от оригинала.
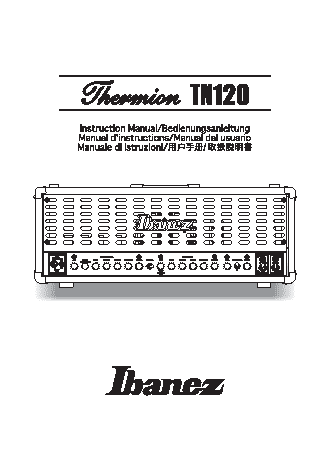
Table of Contents
English ...............................................................................................................................................................  4
Deutsch ..............................................................................................................................................................  8
Francais .............................................................................................................................................................12
Espanol ..............................................................................................................................................................16
Italiano................................................................................................................................................................20
....................................................................................................................................................................24
....................................................................................................................................................................28
Specifications ....................................................................................................................................................32
3
Important Safety Instructions
Read these instructions.
1)
ENGLISH  2)  Keep these instructions.
Heed all warnings.
3)
4)
Follow all instructions.
Do not use this apparatus near water.
5)
6)
Do not block any ventilation openings.  Install in accordance with the manufacturer’s instructions.
7)  Clean only with a dry cloth.
8)  Do not install near any heat sources such as radiators, heat registers, stoves, or other apparatus (including amplifiers) that produce heat.
9)  Do not defeat the safety purpose of the polarized or grounding-type plug.  A polarized plug has two blades with one wider than the other.  A grounding type
plug has two blades and a third grounding prong.  The wide blade or the third prong are provided for your safety. If the provided plug does not fit into your
outlet, consult an electrician for replacement of the obsolete outlet.
10) Protect the power cord from being walked on or pinched particularly at plugs, convenience receptacles, and the point where they exit from the apparatus.
11)  Only use attachments/accessories specified by the manufacturer.
12) Unplug this apparatus during lightning storms or when unused for long periods of time.
13) Refer all servicing to qualified service personnel.  Servicing is required when the apparatus has been damaged in any way, such as power-supply cord or
plug is damaged, liquid has been spilled or objects have fallen into the apparatus, the apparatus has been exposed to rain or moisture, does not operate
normally, or has been dropped.
WARNING - To reduce the risk of fire or electric shock, do not expose this apparatus to rain or moisture.
• “The Lightning Flash with arrowhead symbol within an equilateral triangle, is intended to alert the user to the presence of uninsulated “dangerous voltage” within
the product enclosure that may be of sufficient magnitude to constitute a risk of shock to persons”.
• “The exclamation point within an equilateral triangle is intended to alert the user to the presence of important operating and maintenance (servicing) instructions
in the literature accompanying the product”.
Precautions & Warnings
USE COMMON SENSE AND ALWAYS OBSERVE THESE PRECAUTIONS.
THIS AMPLIFIER IS LOUD! EXPOSURE TO HIGH SOUND VOLUMES MAY CAUSE PERMANENT HEAR-
ING DAMAGE!
No user serviceable parts inside. Refer service to qualified personnel.
• This amplifier uses vacuum tubes. It gets very hot! Always make sure that it is properly ventilated. There should always be six to twelve inches (15-30cm) of
space from the amplifier’s back. Do not block the vent on top as well. Keep flammable and combustible items at a reasonable distance. Do not allow drapes or
curtains near it. Vacuum tube amplifiers generate heat. To insure proper ventilation always make certain there is at least four inches (10cm) of space behind the
rear of the amplifier cabinet.
• Do not use or store the amplifier in locations where it is subject to direct sunlight or in environments that experience extreme temperatures and humidity levels.
• Do not subject the amplifier to shocks by dropping, etc., or treat it roughly in any way.
• Place the amplifier carefully in a stable position.
• To avoid the risk of fire, do not place containers of liquid (such as vases) on the amp.
• Do not expose amplifier to moisture, rainwater or other liquids.
• Keep children away from the amplifier.
• Be sure to connect to an AC power supply that meets the power supply specifications listed on the rear of the unit.
• Always insure that amplifier is properly grounded.
• In case of an electrical storm or if there is any danger of lightning occurring nearby, remove the power plug from the wall socket in advance.
• Always make sure proper impedance load is connected to amplifier. See section on “Maintaining proper load impedance” for specifics.
• Reduce the volume to “0” or switch off the power supply when connecting the guitar shielded cable and the effects or other cables required for external connection.
Note that the noise generated when plugs are inserted and removed may cause severe damage to the equipment.
• Always unplug AC power cord before changing any fuses or tubes. When replacing the fuse, use only same type and rating.
Avoid direct contact with heated tubes.  As a blown fuse often indicates additional problems it is highly recommended that only experienced technicians familiar
with vacuum tube amps perform this operation. Furthermore, there are no user serviceable parts inside. Always refer service to qualified service personnel only.
• Take care not to use excessive force when handling control buttons, switches and controls.
• When you are not using it, leave the power turned off. As long as the Thermion TN120 is connected to an electrical outlet, it is not completely insulated from the
power supply even if the power switch is turned off. If you will not be using the Thermion TN120 for an extended period, leave the power cable disconnected.
• The apparatus should be placed near mains outlet to pull out the power cord plug easily in case of faults.
• Secure the provided power plug to mains socket-outlets that has a protective ground terminal.
Overview
Thanks for buying the Thermion. The name Thermion comes from the original name for the first vacuum tube, the Thermionic Valve. We at Ibanez wanted to
develop a tube amplifier that reflected the essence of vacuum tube amplification. We took a back to basics approach so what better name than “Thermion”? This
amplifier has absolutely no solid-state devices at all in the signal chain. That was by design. Even the effect loop is completely tube coupled both in the send and
return. The power supply is massive. The Toroidal power transformer is oversized for plenty of reserve power and low noise.  The rectifier section uses special fast
switching, soft recovery diodes that work like vacuum tube rectifiers except that they handle way more power keeping the bottom end tight and responsive.
All preamp tubes are graded and selected 7025SS/12AX7s. Only super low noise 7025SS/12AX7s are used in the front end of this amp. Also the filaments of the
first two-preamp tubes, which make up the first four critical stages of tone, are run on DC to further reduce any noise or hum. The output tubes are selected and
matched to insure perfect balance of the push pull power amp stage. The power amp comes standard with 6L6GCs but can be easily converted to 6550s (popular
Metal Head tube of the 1980s and 1990s) if a thicker more powerful sound is required. It is highly recommended though that only experienced technicians familiar
with vacuum tubes perform this operation
Included Accessories
TNFS3 dedicated foot switch for the TN120
Power Cable
Owner’s Manual
Foot switch cable
4
Power Tube Bias
ENGLISH
In order to maintain the original sound of the Thermion, it is important that proper output tube bias is maintained. We have provided a simple method for quickly
biasing your amplifier. It is highly recommended that only experienced technicians familiar with vacuum tubes perform this operation, as there are lethal voltages
within the amp as well as very hot tubes.
Maintaining Proper Output Impedance
Proper impedance of the speakers to the amplifier are very important. Improperly matched impedances can cause poor performance or in some cases damage the
amplifier. Always make certain proper load is connected before operating the amplifier. Failure to do so could pose a shock hazard. It is therefore very important to
properly connect your speaker cabinet or cabinets to the proper jack or jacks. Please reference the following diagrams in order to obtain the correct hookup for your
situation.
1 x 4 ohm connection
2 x 16 ohm connection
1 x 16 ohm connection
5