На сайте 123408 инструкций общим размером 499.34 Гб , которые состоят из 6235299 страниц
Фото
Руководство пользователя KENWOOD KTC-D600E. Основные функции, характеристики и условия эксплуатации изложены на 22 страницах документа в pdf формате.
Доступно к просмотру 22 страницы. Рекомендуем вам скачать файл инструкции, поскольку онлайн просмотр документа может сильно отличаться от оригинала.
KTC-D600E
DIGITAL TV TUNER
INSTRUCTION MANUAL
© B64-4758-08/00 (E)
1-KTC-D600E_ENG_1018.indd   1                                       2010-10-18   ?? 1:48:47
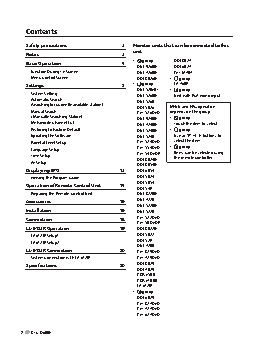
Contents
Safety precautions                 3   Monitor units that can be connected to this
unit
Notes                              3
Basic Operation                    4   •  A  group    DDX8027
DNX9260BT    DDX6027
Function During TV Screen              DNX7260BT    KVT-M707
Menu Control Screen                    DDX8026BT  •  D  group
Settings                           5   •  B  group    LZ-760R
DNX520VBT  •  E  group
System Setting                         DNX5260BT    Unit with RCA video input
Automatic Search                       DNX5260
(Searching for currently available station)    DDX5026  MENU and EPG operation
Manual Search                          KVT-526DVD  depends on the group.
( Manually Searching Station)          DNX9240BT  •  A  group
My Favorite Channel List               DNX7240BT    Touch the item to select.
Restoring to Factory Default           DNX5240BT  •  B  group
Updating the Software                  DNX5240       Use ?, ?, ?, ? buttons to
Parental Level Setup                   KVT-524DVD   select the item.
Language Setup                         KVT-554DVD  •  C  group
Items can be selected using
Time Setup                             KVT-54DVDR    the remote controller
AV Setup                               DDX8024BT
DDX8054BT
Displaying EPG                    13     DDX6054
Viewing the Program Guide              DDX5024
DDX5054
Operation of Remote Control Unit   14    DDX54R
Preparing the Remote Control Unit      DNX8220BT
Accessories                       16     DNX7220
DNX5220BT
Installation                      16     DNX5220
Connection                        18     KVT-522DVD
KVT-50DVDR
LZ-612IR Operation                19     DDX8022BT
LZ-612IR Setup1                        DDX5022
LZ-612IR Setup2                        DDX52R
DNX7200
LZ-612IR Connection               20     KVT-829DVD
System Connection with LZ-612IR        KVT-729DVD
Specifications                    20     DDX8029
DDX7029
KOS-V500
KOS-V1000
LZ-612IR
•  C group
DDX6029
KVT-827DVD
KVT-727DVD
KVT-627DVD
2     KTC-D600E
1-KTC-D600E_ENG_1018.indd   2                                       2010-10-18   ?? 1:48:47
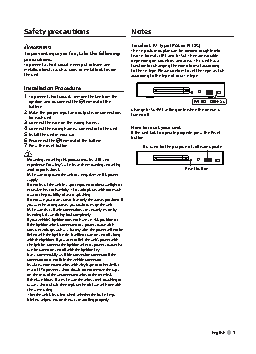
Safety precautions                    Notes
WARNING                              To select TV Type (PAL or NTSC)
To prevent injury or fire, take the following   The TV picture display can be divided roughly into
precautions:                          two TV formats (PAL and NTSC). They are variable
depending on countries and areas. This unit has a
To prevent a short circuit, never put or leave any   function for changing the video format according
metallic objects (such as coins or metal tools) inside   to the TV type. Please confirm to set the Type switch
the unit.                             according to the type of your TV type.
Installation Procedure
1 To prevent short circuits, remove the key from the
ignition and disconnect the   terminal of the               PAL     NTSC
battery.
2 Make the proper input and output wire connections   Change NTSC/PAL setting only when the device is
for each unit.                       turned off.
3 Connect the wire on the wiring harness.
4 Connect the wiring harness connector to the unit.  How to reset your unit
5 Install the unit in your car.       If the unit fails to operate properly, press the Reset
6 Reconnect the   terminal of the battery.  button.
7 Press the reset button.                 It is used for the purpose of software update.
•  Mounting and wiring this product requires skills and
experience. For safety’s sake, leave the mounting and wiring
work to professionals.                                   Reset button
•  Make sure to ground the unit to a negative 12V DC power
supply.
•  Do not install the unit in a spot exposed to direct sunlight or
excessive heat or humidity. Also avoid places with too much
dust or the possibility of water splashing.
•  Do not use your own screws. Use only the screws provided. If
you use the wrong screws, you could damage the unit.
•  Make sure that all wire connections are securely made by
inserting jacks until they lock completely.
•  If your vehicle’s ignition does not have an ACC position, or
if the ignition wire is connected to a power source with
constant voltage such as a battery wire, the power will not be
linked with the ignition (i.e., it will not turn on and off along
with the ignition). If you want to link the unit’s power with
the ignition, connect the ignition wire to a power source that
can be turned on and off with the ignition key.
•  Use a commercially available conversion connector if the
connector does not fit in the vehicle connector.
•  Insulate unconnected wires with vinyl tape or other similar
material. To prevent a short circuit, do not remove the caps
on the ends of the unconnected wires or the terminals.
•  If the fuse blows, first make sure the wires aren’t touching to
cause a short circuit, then replace the old fuse with one with
the same rating.
•  After the unit is installed, check whether the brake lamps,
blinkers, wipers, etc. on the car are working properly.
English     3
1-KTC-D600E_ENG_1018.indd   3                                       2010-10-18   ?? 1:48:48