На сайте 126950 инструкций общим размером 514.06 Гб , которые состоят из 6425133 страниц
Фото
Руководство пользователя LINCOLN MKX (2008) QRG. Основные функции, характеристики и условия эксплуатации изложены на 2 страницах документа в pdf формате.
Доступно к просмотру 2 страницы. Рекомендуем вам скачать файл инструкции, поскольку онлайн просмотр документа может сильно отличаться от оригинала.
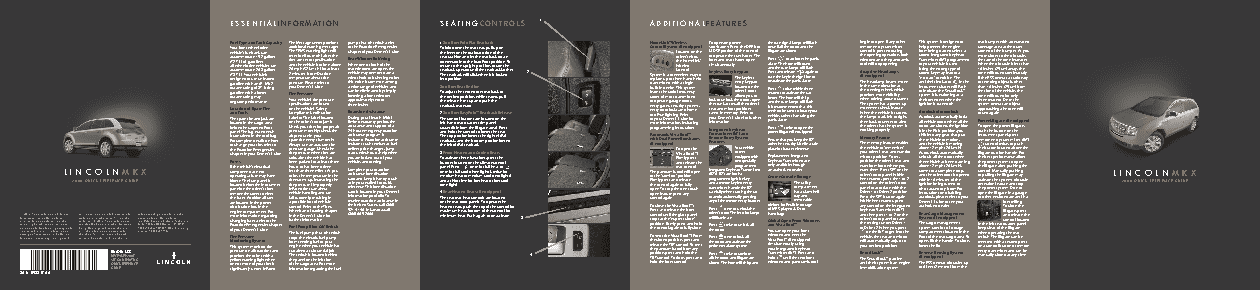
essen T i AL in F o RMAT ion                                               se AT in G con TR o LS              1                                ..     A ddi T i O n AL FEATURES
Fuel Type and Tank Capacity  The Message center provides   pump shut-off switch, refer   1 2nd Row Fold Flat Seatback                                  HomeLink® Wireless   To operate power     the turn signal lamps will flash   begin to open. If any other   This system is designed to   rear bumper with a decreased
Your front-wheel drive   additional warning messages.   to the Roadside Emergencies   To fold down the rear seat, pull up on                           Control System (if equipped)  sunshades: Press the OPEN or   once if all the doors and the   remote entry transmitter   help prevent the engine   coverage area at the outer
vehicle’s fuel tank can   The TPMS warning light will   chapter of your Owner’s Guide.  the lever on the outboard side of the                                   Located on the   CLOSE portion of the control   liftgate are closed.  control is pressed during   from being started unless a   corners of the bumper. As you
accommodate 19.2 gallons   reset itself (turn off) after the   Rear Window Buffeting  seat cushion and let the seatback rotate                                  driver’s visor,   to operate the sunshades. The   Press    to activate the panic   the opening operation, both   coded Integrated Keyhead   move closer to the obstacle,
(72.7 L) of gasoline;    tires are set to specification                    downward into the load floor position. To                                            the HomeLink®   front and rear shades open   alarm. The horn will sound   windows and the panoramic   Transmitter (IKT) programmed   the rate of the tone increases.
all-wheel drive vehicles can   and the vehicle is driven above   When one or both of the   return to the upright position, rotate the                           Wireless    simultaneously.      and the turn lamps will flash.    roof will stop opening.  to your vehicle is used.   When the obstacle is less than
accommodate 20.8 gallons   20 mph (32 km / h) for at least   rear windows are open, the   seatback upward until the seatback latches.   2                       Control     Keyless Entry Keypad  Press and release    again or    Adaptive Headlamps    Using the wrong type of   10 inches (25 cm) away, the
(78.7 L). Your vehicle is   2 minutes. Note: Outside   vehicle may demonstrate a   The seatback will click when it is locked                           System is a convenient way to             turn the key in the ignition to   (if equipped)        coded key may lead to a   tone will sound continuously.
designed to use unleaded   temperature affects tire   wind throb or buffeting noise;   into position.                                                  replace up to three hand-held   The keyless   deactivate the panic alarm.   The headlamp beams move   “no start” condition. The   If the RSS detects a stationary
gasoline with an (R+M)/2   pressure. Please refer to    this noise is common among                                                                     transmitters with a single    entry keypad                                  in the same direction as   anti-theft indicator    in the   or receding object further
octane rating of 87. Using   your Owner’s Guide.   a wide range of vehicles and   2nd Row Seat Recline                                                 built-in device. This system   located on the   Press    twice within three   the steering wheel, which   instrument cluster will flash   than 10 inches (25 cm) from
gasoline with a lower    Tire Pressure    can be eliminated by simply      To adjust the second row seatback to                                        learns the radio frequency    driver’s door   seconds to activate the car   provides more visibility   to indicate the SecuriLock™   the side of the vehicle, the
octane rating may                         lowering a front window          the desired position, while seated, pull                                    codes of most transmitters    allows you to   finder. The horn will chirp    when driving around curves.   system is functioning as a   tone will sound for only
degrade performance.   Your vehicle’s tire pressure   approximately two to    the release lever up and push the                                        to operate garage doors,    lock or unlock the doors, open   and the turn lamps will flash.      theft deterrent when the   three seconds. Once the
specifications are found   three inches.              seatback rearward.                                                          entry gates, security systems,    the trunk, or recall the driver’s         The system has a power-up   ignition is turned off.   system detects an object
Location of Spare Tire   on the vehicle’s Safety                                                                                                       entry door locks, and home    seat and mirror positions   It is recommended that this   movement check feature.       approaching, the tone will
and Tools            Compliance Certification   Roadside Assistance        2  2nd Row EasyFold™ Seatback Release                                       or office lighting. Refer    saved in memory. Refer to   method be used to locate your   When the vehicle is started,   Autolock/Autounlock  sound again.
vehicle, rather than using the
The spare tire and jack are   Label or Tire Label located    During your Lincoln MKX’s   The control buttons are located on the                        to your Owner’s Guide for    your Owner’s Guide for further   panic alarm.  the lamps track left to right,   Autolock automatically locks   Power Liftgate (if equipped)
located in the cargo area   on the driver’s door jamb.    limited warranty period, the   left-hand rear quarter trim panel                             more information, including   information.                                  then back to center to alert   all vehicle doors when all the
below the carpeted floor   Check your tires for proper air   assurance and support of a   (accessible from the liftgate area). Press                   programming instructions.  Integrated Keyhead   Press    twice to open the   the driver that the system is   doors are closed, the ignition   To open the power liftgate,
panel. The lug nut wrench   pressure monthly; check the   24-hour emergency roadside   and hold the control to lower the seat.                                              Transmitter (IKT) and   power liftgate (if equipped).   working properly.   is in the RUN position, you   push the button on the
is contained in the tool bag.    air pressure in your    assistance program is   The top portion lowers the right (40%)                                Panoramic Vista Roof™   Remote Entry System                                 Memory Feature       shift into any gear that puts   instrument panel, press
For complete details on how   spare tire every six months.    included. Roadside assistance   seatback, and the bottom portion lowers                  with Dual Power Sunshades   Features      Ensure that you keep the IKT                           the vehicle into motion,   remote entry transmitter (IKT)
to change your tire, refer to   Always use an accurate tire    includes such services as fuel   the left (60%) seatback.                               (if equipped)                             adhesive security label in a safe   The memory feature enables   and the vehicle is moving    control twice, or push
the Roadside Emergencies    pressure gauge. Check the   delivery, tire changes, jump                                                                            To open the          Your vehicle   place for future reference.    the vehicle to “remember”   above 12 mph (20 km/h).     the button located above the
chapter in your Owner’s Guide.   tire pressure when tires are   starts, winch outs, help when   3  Front Heated and Cooled Seats                                Vista Roof™:         comes                                         your driver’s seat and exterior   Autounlock automatically   liftgate outside handle. For
cold, after the vehicle has   you are locked out of your   To activate these functions, press the                                          Firmly press         equipped with   Replacement Integrated        mirrors position. To set,   unlocks all the doors when   the best performance allow
Fuses                been parked for at least three   vehicle, and towing.   buttons located on the climate control                                             and release the      two specially   Keyhead Transmitters are      position the driver’s seat and   the vehicle has been traveling   the power system to open
only available through
programmed
exterior mirrors where you
rear control.
L inc OL n MKX                                              If the vehicle’s electrical   hours or has been driven   Complete your roadside   panel. Press    once for full heat or                                The panoramic roof will open   Integrated Keyhead Transmitters   an authorized dealer.  want them. Press SET on the   above 12 mph (20 km/h),   the liftgate after pushing the   L inc OL n MKX
comes to a complete stop,
control. Manually pushing
less than three miles. (As you
once for full cool (three lights), twice for
components are not
operating, a fuse may have   drive, the temperature in the   assistance identification   medium heat or medium cool (two lights)                       to the “comfort” position.   (IKTs). IKTs are both a   Center Console Storage  driver’s door panel. Within   and the driver door is opened   or pulling the liftgate may
2008 Quick Refe R ence Guide                             blown. The fuse panel is   tire warms up, increasing the   card and keep it handy (such   and a third time for low heat or low cool                    Firmly press and release    programmed ignition key   The utility           five seconds, press the 1 or 2   within 10 minutes of the   activate the systems obstacle     2008 Quick Refe R ence Guide
as in your wallet) for quick
located below the instrument   tire pressure.) Improperly   reference. This identification   (one light).                                              the control again to fully   and a remote keyless entry   compartment       control on the driver’s door   ignition being turned to   detection feature and stop
panel on the driver’s side;   inflated tires can affect   card is located in your Owner’s                                                              open. To stop the one-touch   transmitter. Handle the IKT   has a clamshell   panel to associate with the   off or accessory. Note: For   the power system. Do not
remove the cover to view   vehicle handling and can   Information portfolio. To   4 Rear Heated Seats (if equipped)                                    open feature press any    carefully when starting the car   tray and        Driver 1 or Driver 2 position.   instructions on disabling   open the liftgate in a garage
the fuses. Additional fuses   fail suddenly, resulting in   receive roadside assistance in   The rear seat heat controls are located                   control again.       to avoid accidentally pressing   removable             Press the SET button again.   autolock, please refer to your   or other enclosed area with a
are located in the power   a possible loss of vehicle   the United States, call (800)   on the rear door panels. To operate the                                             any of the remote entry buttons.   divider for flexible storage   Within five seconds, press   Owner’s Guide or see your   low ceiling.
distribution box in the   control. Refer to the Tires,   521-4140. In Canada, call    heated seats, push the top of the control for                    To close the Vista Roof™:   Press    once to unlock the   of MP3 players, CDs or   any control on the Integrated   authorized dealer.  To close the
engine compartment. For   Wheels and Loading chapter                       maximum heat, bottom of the control for                                     Press and release the front   driver’s door. The interior lamps             Keyhead Transmitter (IKT)                          liftgate, press
This Quick Reference Guide is not intended   your new vehicle and refer to the appropriate   detailed operating and safety information,   more information regarding   in the Owner’s Guide for   (800) 665-2006.   minimum heat. Push again to deactivate.   control until the glass panel   handbags.        and then press 1 or 2 on the   Rear Cargo Management   and release the
to replace your vehicle Owner’s Guide   sections when questions arise. All information   please refer to your Owner’s Guide.                                                         3                                             stops at the “express close”   will illuminate.                             driver’s door panel to save   System (if equipped)  control located
which contains more detailed information   contained in this Quick Reference Guide was   Ford Motor Company, Customer Relationship   changing fuses, refer to the   further information.                                                                                     Global Open Front Windows
concerning the features of your vehicle, as   accurate at the time of duplication. We reserve   Center, P.O. Box 6248, Dearborn, MI 48121   Roadside Emergencies chapter                                                           position. Firmly press and hold   Press    twice to unlock all   and Vista Roof™  the settings under Driver 1   The cargo management   in the left rear quarter panel.
well as important safety warnings designed to   the right to change features, operation and/  1-800-392-3673 (FORD), (TDD for the hearing   of your Owner’s Guide.  Fuel Pump Shut-Off Switch                                      the control again to fully close.   the doors.                              or Driver 2. When you press   system consists of storage   Keep clear of the liftgate
help reduce the risk of injury to you and your   or functionality of any vehicle specification   impaired: 1-800-232-5952)  The fuel pump shut-off switch                                                                                                                    You can open your front              on the IKT to get into the   compartments located in the   when operating the rear
passengers. Please read your entire Owner’s   at any time. Your Lincoln dealer is the best                                                                                                                                         To vent the Vista Roof™: From             windows and vent the
Guide carefully as you begin learning about   source for the most current information. For   Tire Pressure   stops the electric fuel pump                                                                                                               Press    once to lock all                              vehicle, the seat and mirrors   floor of the rear cargo area. To   switch. The liftgate can be
Monitoring System    from sending fuel to your                                                                                                         the closed position, press and   the doors and activate the   Vista Roof™ (if equipped)   will automatically adjust to   open, lift the handle. To close,   reversed with a second press
This system monitors tire   engine when your vehicle has                                                                                               release the TILT control. To vent   perimeter alarm system.  simultaneously using   your desired positions.   lower the lid.  on a control button or remote
your Integrated Keyhead
the panoramic roof from any
LincoLn MKX                                pressure on all road tires and   sustained a substantial jolt.                                                                                         position, press and hold the   Press    twice to confirm   Transmitter (IKT). Press and   SecuriLock™  Reverse Sensing System    entry transmitter and can be
December 2007                              provides the driver with a   The switch is located behind                                                   4                                          TILT control. To close, press and         hold    until the two front                            (if equipped)        manually closed at any time.
SecOND PriNtiNg                            yellow warning light when    the panel on the left side                                                                                                                     all the doors and liftgate are   windows and panoramic roof   The SecuriLock™ passive
Quick refereNce                            one or more of your tires is   of the cargo area. For more                                                                                             hold the front control.  closed. The horn will chirp and                    anti-theft system is an engine   The RSS detects obstacles up
guiDe                                      significantly under-inflated.   information regarding the fuel                                                                                                                                                                     immobilization system.   to 6 feet (2 meters) from the
8A1J 19G217 AA
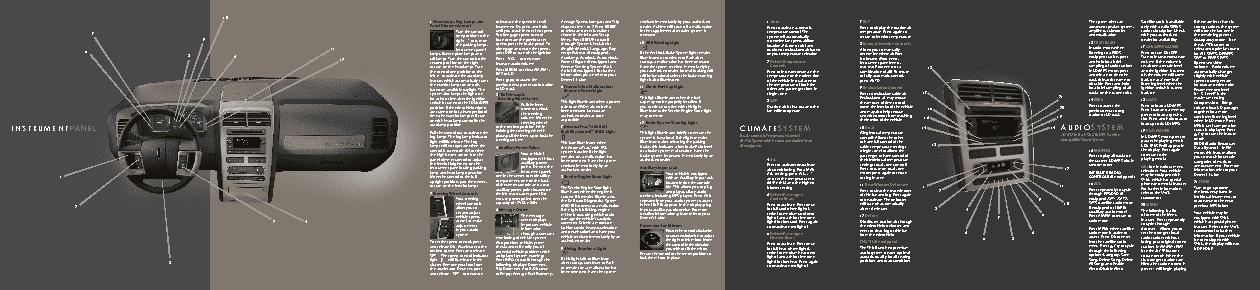
10 1 Headlamps, Fog Lamps and or increase the speed in small Average Speed, Compass and Trip serviced immediately by your authorized 1 Auto 7 EXT The system offers an Satellite radio is available If there are less than six Panel Dimmer Control increments. Or, press and hold elapsed time 1 or 2. Press RESET dealer. A chime will sound if a malfunction Press to activate automatic Press to display the outside air advanced speaker system, only with a valid SIRIUS strong stations, the system Turn the control until you reach the desired speed. to select and reset functions in the supplemental restraint system is temperature control. The temperature. Press again to amplifiers, subwoofer radio subscription. Check will store the last one in 7 one position to the To disengage speed control shown in the Info and Setup detected. system will automatically return to interior temperature. and equalization. with your authorized the remaining presets. 9 right to turn on but not erase the previous set Menu. Press SETUP to scroll 10 ABS Warning Light determine fan speed, airflow 13 TEXT/SCAN dealer for availability. Occupancy mode – Use the parking lamps, speed, press the brake pedal. To through: System Check, Units location, A/C (on or off) and 8 Manual Override Controls the / buttons to 11 instrument panel disengage and erase the speed, (English/Metric), Language, Easy Allows you to manually In radio mode, when 17 ON/OFF/VOLUME select and optimize sound 6 lamps, license plate lamps and press OFF or turn off the ignition. entry/Exit seat (if equipped), If the Anti-lock Brake System light remains outside or recirculated air based determine where airflow listening to a RBDS- Press to turn ON/OFF. for ALL SEATS, DRIVERS 8 5 Autolamp, Autolock, Autounlock, illuminated or continues to flash after on your temperature selection. equipped station, press Turn to increase/decrease SEAT or REAR SEATS. 12 tail lamps. Turn the control to the Press – VOL + to decrease/ is directed (floor vents, second position on the right increase audio volume. Power Liftgate (if equipped) and startup, a malfunction has been detected. 2 Driver Temperature instrument panel vents, and hold for a brief volume. If the volume is Speed sensitive to turn on the headlamps. Turn Press MEDIA to select AM, FM1, Reverse Sensing System (Park Have the system serviced immediately by Controls rear seat floor vents or a 18 sampling of radio stations. set above a certain level volume – Radio volume the control one position to the FM2 or CD. Assist) (if equipped). For further your authorized dealer. Normal braking will Press to increase/decrease the combination of all). To return In CD/MP3 mode, press and the ignition is turned automatically changes left to activate the autolamp information, please refer to your still be functional unless the brake warning temperature on the driver side to fully automatic control, and release to view the off, the volume will come slightly with vehicle feature, which automatically turns Press to access the Owner’s Guide. light is also illuminated. of the vehicle in dual zone or press AUTO. track title, artist name or back on at a “nominal” speed to compensate the exterior lamps on and off, previous/next preset radio station 6 Transmission Malfunction/ 11 Check Fuel Cap Light the temperature of both the disc title. Press and hold listening level when the for road and wind noise. based on available daylight. The or CD track. Reduced Power Light driver and passenger sides in 9 Recirculation Control for a brief sampling of all ignition switch is turned Recommended level system also keeps the lights on 3 Tilt/Telescopic single zone. Press to recirculate cabin air. 17 tracks on the current disc. back on. is 1-3. Level 7 is the for a short time after the ignition Steering Wheel Lever This light illuminates when the fuel Recirculated air may reduce 21 14 SEEK 18 LOAD maximum setting. switch is turned to the LOCK (OFF) Pull the lever This light illuminates when a power cap may not be properly installed. If 3 OFF the amount of time to cool Compression – Brings position. If the windshield wipers down to unlock train or an AWD malfunction has you continue to drive with this light Outside air is shut out and the down the interior of the vehicle 16 20 Press to access the Press to load a CD/MP3. soft and loud CD passages are turned on for a fixed period of the steering been detected. Contact an illuminated, the Service Engine Soon light fan will not operate. and may also help reduce previous/next strong Press Load and a memory together for a more time, the exterior lamps will turn column. Move the authorized dealer as soon may come on. undesired odors from reaching 15 19 station or CD track. preset to load a specific consistent listening level on with headlamp control in the steering wheel as possible. 12 Brake System Warning Light the interior of the vehicle. slot. Press and hold to auto when in CD mode. Press load up to six CD/MP3s. ins TR u M en T PA n EL autolamp position. to the desired position. While 7 AdvanceTrac® with Roll cL i MAT e S y STEM 10 Dual 14 14 A udi O S y STEM MENU until compression status is displayed. Press Pull the control out to activate the holding the steering wheel in Stability Control™ (RSC) Light This light illuminates briefly to ensure the (Single/dual temperature AM/FM In-Dash Six CD/MP3 Satellite 19 PLAY/PAUSE / to turn the feature fog lamps. The fog lamp indicator place, pull the lever up to lock the system is functional. If the light remains Dual Automatic Temperature Control control): Allows the driver In CD/MP3 mode, press to on/off. light will illuminate. The fog steering column. This icon illuminates when illuminated after releasing the parking (DATC) System with Heated and Cooled Seats to have full control of the Compatible Sound System pause the playing media. RBDS (Radio Broadcast lamps will not operate when the 4 Auxiliary Power Points the AdvanceTrac® with RSC brake, this indicates a low brake fluid level (if equipped) cabin temperature settings 13 CDX PAUSE will appear in Data System) – In FM control is turned off (O) or when system is active. If the light or a brake system malfunction. Have the (single zone) or allows the 15 SHUFFLE the display. Press again mode, this feature allows the high beams are on. Use the Your vehicle is remains on, a malfunction has brake system inspected immediately by an passenger to have control of Press to play all tracks on to return to the you to search for certain panel dimmer control to adjust equipped with four been detected. Have the system authorized dealer. 4 A/C their individual temperature the current CD/MP3 disc in playing media. categories of music or the level of brightness on the auxiliary power serviced immediately by an Press to activate/deactivate settings (dual zone control). random order. announcements. For more instrument panel during parking points. One on the authorized dealer. Auxiliary Input Jack air conditioning. For a MAX Press to turn on dual zone 12 OK: Use in various menu information, refer to your lamp and headlamp operation. instrument panel, Your vehicle is equipped A/C setting, press A/C, mode; press again to return SATELLITE RADIO selections. Your vehicle Owner’s Guide. 1 Move the control to the full one in the center console utility 8 Service Engine Soon Light with an Auxiliary Input Jack and set the temperature to to single zone. CONTROLS (if equipped): may be equipped with upright position, past the detent, compartment, one on the back located inside the console 60?F (16?C) and the highest 16 AUX SYNC which has special 21 TUNE to turn on the interior lamps. of the center console and a rear The Service Engine Soon light bin. This allows you to plug blower setting. 11 Rear Window Defroster 1 11 phone and media features. Turn to go up/down auxiliary power point located on Press to clear the rear window 2 Press repeatedly to cycle For further information, and play auxiliary audio 2 Steering Wheel Controls the left rear quarter panel. Do illuminates when the engine is devices, including MP3 players. Press AUX 5 Driver/Passenger of thin ice and fog. Press again through FES/DVD (if refer to the SYNC the frequency band in Your steering not use power points over the started. If it remains illuminated, repeatedly on your audio system to access. Cooled Seats to deactivate. The defroster 9 equipped), SAT1, SAT2, supplement. individual increments, or the On Board Diagnostics System to advance to the next/ wheel controls capacity of 12VDC/180W. When LINE IN appears in the display, plug Press to activate. Press once will turn off automatically 10 SAT3 (satellite radio mode 20 MENU 2 allow you to (OBD-II) has detected a malfunction. in your auxiliary audio device. For more for full cool (three lights), after 10 minutes. 3 4 if equipped) or LINE IN previous MP3 folder. set and adjust 5 Message Center If the light is blinking, engine detailed information, please refer to your twice for medium cool (two (auxiliary audio mode). The following is a list Your vehicle may be misfire is occurring which could vehicle speed, The message damage the vehicle’s catalytic Owner’s Guide. lights) and a third time (one 12 Defrost 7 6 Press AM/FM to return to of some of the Menu equipped with SYNC 2 4 as well as make center displays converter. Drive in a moderate light) for low cool. Press again Distributes outside air through radio mode. features. Press repeatedly which has special phone adjustments important vehicle fashion (avoid heavy acceleration Power Outside Mirrors to deactivate (no lights). the windshield defroster and to cycle through: features. Refer to the SYNC in your audio information and deceleration) and have your Rotate the control clockwise vents to clear fog or thin ice Press MENU when satellite Autoset – Allows you to supplement for further system. through a constant or counterclockwise to adjust 6 Driver/Passenger from the windshield. 5 5 radio mode is active to set the strongest local information. If your vehicle monitoring of vehicle systems. vehicle serviced immediately by an the right or left mirror. Move Heated Seats 6 8 access. Press OK to enter radio stations without is not equipped with To set the speed control, press Also provides vehicle system authorized dealer. the control in the direction Press to activate. Press once THX® II (if equipped) into the satellite radio losing your original stored SYNC, the display will read and release ON. Accelerate to the checks and will notify you of 9 Airbag Readiness Light you wish to tilt the mirror. for full heat (three lights), The THX II certified premium menu. Press / to cycle stations in AM/FM1/FM2. NO PHONE. desired speed. Press and release potential vehicle problems with Return the control to the center position to twice for medium heat (two audio system creates optimal through the following Use the / buttons SET +. The speed control indicator a display of system warnings. lock the mirrors in place. lights) and a third time (one acoustic quality for all seating options: Category, Save to turn on/off. When the light will illuminate in the Press INFO to scroll through the If this light fails to illuminate positions and road conditions. Song, Delete Song, Delete six strongest stations are 3 cluster. Remove your foot from following displays: Odometer, after startup, continues to flash light) for low heat. Press again All Songs and Enable filled, the station stored in the accelerator. Once set, press Trip Odometer A or B, Distance or remains on, a malfunction has to deactivate (no lights). Alerts/Disable Alerts. preset 1 will begin playing. and release - SET + to decrease to Empty, Average Fuel Economy, been detected. Have the system