На сайте 123405 инструкций общим размером 499.33 Гб , которые состоят из 6235256 страниц
Фото
Руководство пользователя YAMAHA PSR-195. Основные функции, характеристики и условия эксплуатации изложены на 52 страницах документа в pdf формате.
Доступно к просмотру 50 страниц. Рекомендуем вам скачать файл инструкции, поскольку онлайн просмотр документа может сильно отличаться от оригинала.
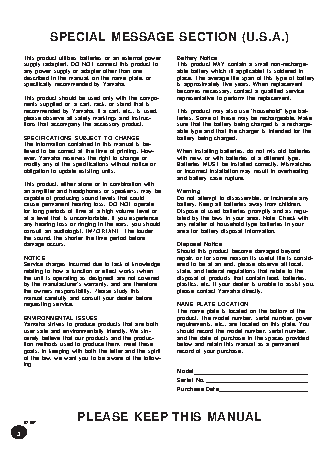
SPECIAL MESSAGE SECTION (U.S.A.)
This product utilizes batteries or an external power    Battery Notice:
supply (adapter). DO NOT connect this product to        This product MAY contain a small non-recharge-
any power supply or adapter other than one              able battery which (if applicable) is soldered in
described in the manual, on the name plate, or          place. The average life span of this type of battery
specifically recommended by Yamaha.                     is approximately five years. When replacement
becomes necessary, contact a qualified service
This product should be used only with the compo-        representative to perform the replacement.
nents supplied or; a cart, rack, or stand that is
recommended by Yamaha. If a cart, etc., is used,        This product may also use “household” type bat-
please observe all safety markings and instruc-         teries. Some of these may be rechargeable. Make
tions that accompany the accessory product.             sure that the battery being charged is a recharge-
able type and that the charger is intended for the
SPECIFICATIONS SUBJECT TO CHANGE:                       battery being charged.
The information contained in this manual is be-
lieved to be correct at the time of printing. How-      When installing batteries, do not mix old batteries
ever, Yamaha reserves the right to change or            with new, or with batteries of a different type.
modify any of the specifications without notice or      Batteries MUST be installed correctly. Mismatches
obligation to update existing units.                    or incorrect installation may result in overheating
and battery case rupture.
This product, either alone or in combination with
an amplifier and headphones or speaker/s, may be        Warning:
capable of producing sound levels that could            Do not attempt to disassemble, or incinerate any
cause permanent hearing loss. DO NOT operate            battery. Keep all batteries away from children.
for long periods of time at a high volume level or      Dispose of used batteries promptly and as regu-
at a level that is uncomfortable. If you experience     lated by the laws in your area. Note: Check with
any hearing loss or ringing in the ears, you should     any retailer of household type batteries in your
consult an audiologist. IMPORTANT: The louder           area for battery disposal information.
the sound, the shorter the time period before
damage occurs.                                          Disposal Notice:
Should this product become damaged beyond
NOTICE:                                                 repair, or for some reason its useful life is consid-
Service charges incurred due to lack of knowledge       ered to be at an end, please observe all local,
relating to how a function or effect works (when        state, and federal regulations that relate to the
the unit is operating as designed) are not covered      disposal of products that contain lead, batteries,
by the manufacturer’s warranty, and are therefore       plastics, etc. If your dealer is unable to assist you,
the owners responsibility. Please study this            please contact Yamaha directly.
manual carefully and consult your dealer before
requesting service.                                     NAME PLATE LOCATION:
The name plate is located on the bottom of the
ENVIRONMENTAL ISSUES:                                   product. The model number, serial number, power
Yamaha strives to produce products that are both        requirements, etc., are located on this plate. You
user safe and environmentally friendly. We sin-         should record the model number, serial number,
cerely believe that our products and the produc-        and the date of purchase in the spaces provided
tion methods used to produce them, meet these           below and retain this manual as a permanent
goals. In keeping with both the letter and the spirit   record of your purchase.
of the law, we want you to be aware of the follow-
ing:
Model
Serial No.
Purchase Date
PLEASE KEEP THIS MANUAL
92-BP
2
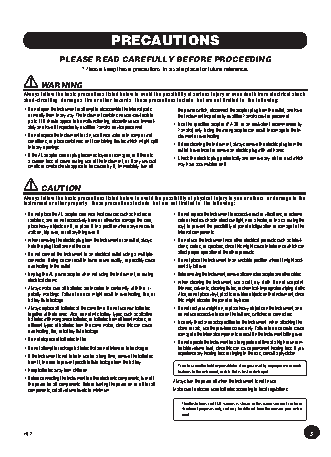
PRECAUTIONS
PLEASE READ CAREFULLY BEFORE PROCEEDING
* Please keep these precautions in a safe place for future reference.
WARNING
Always follow the basic precautions listed below to avoid the possibility of serious injury or even death from electrical shock,
short-circuiting, damages, fire or other hazards. These precautions include, but are not limited to, the following:
• Do not open the instrument or attempt to disassemble the internal parts  the power switch, disconnect the adaptor plug from the outlet, and have
or modify them in any way. The instrument contains no user-serviceable  the instrument inspected by qualified Yamaha service personnel.
parts. If it should appear to be malfunctioning, discontinue use immedi-
ately and have it inspected by qualified Yamaha service personnel.  • Use the specified adaptor (PA-3B or an equivalent recommended by
Yamaha) only. Using the wrong adaptor can result in damage to the in-
• Do not expose the instrument to rain, use it near water or in damp or wet  strument or overheating.
conditions, or place containers on it containing liquids which might spill
into any openings.                                  • Before cleaning the instrument, always remove the electric plug from the
outlet. Never insert or remove an electric plug with wet hands.
• If the AC adaptor cord or plug becomes frayed or damaged, or if there is
a sudden loss of sound during use of the instrument, or if any unusual  • Check the electric plug periodically and remove any dirt or dust which
smells or smoke should appear to be caused by it,  immediately turn off  may have accumulated on it.
CAUTION
Always follow the basic precautions listed below to avoid the possibility of physical injury to you or others, or damage to the
instrument or other property. These precautions include, but are not limited to, the following:
• Do not place the AC adaptor cord near heat sources such as heaters or  • Do not expose the instrument to excessive dust or vibrations, or extreme
radiators, and do not excessively bend or otherwise damage the cord,  cold or heat (such as in direct sunlight, near a heater, or in a car during the
place heavy objects on it, or place it in a position where anyone could  day) to prevent the possibility of panel disfiguration or damage to the
walk on, trip over, or roll anything over it.         internal components.
• When removing the electric plug from the instrument or an outlet, always  • Do not use the instrument near other electrical products such as televi-
hold the plug itself and not the cord.                sions, radios, or speakers, since this might cause interference which can
affect proper operation of the other products.
• Do not connect the instrument to an electrical outlet using a multiple-
connector. Doing so can result in lower sound quality, or possibly cause  • Do not place the instrument in an unstable position where it might acci-
overheating in the outlet.                            dentally fall over.
• Unplug the AC power adaptor when not using the instrument, or during  • Before moving the instrument, remove all connected adaptor and other cables.
electrical storms.
• When cleaning the instrument, use a soft, dry cloth. Do not use paint
• Always make sure all batteries are inserted in conformity with the +/-  thinners, solvents, cleaning fluids, or chemical-impregnated wiping cloths.
polarity markings. Failure to do so might result in overheating, fire, or  Also, do not place vinyl, plastic or rubber objects on the instrument, since
battery fluid leakage.                                this might discolor the panel or keyboard.
• Always replace all batteries at the same time. Do not use new batteries  • Do not rest your weight on, or place heavy objects on the instrument, and
together with old ones. Also, do not mix battery types, such as alkaline  do not use excessive force on the buttons, switches or connectors.
batteries with manganese batteries, or batteries from different makers, or  • Use only the stand/rack specified for the instrument. When attaching the
different types of batteries from the same maker, since this can cause  stand or rack, use the provided screws only. Failure to do so could cause
overheating, fire, or battery fluid leakage.
damage to the internal components or result in the instrument falling over.
• Do not dispose of batteries in fire.
• Do not operate the instrument for a long period of time at a high or uncom-
• Do not attempt to recharge batteries that are not intended to be charged.  fortable volume level, since this can cause permanent hearing loss. If you
experience any hearing loss or ringing in the ears, consult a physician.
• If the instrument is not to be in use for a long time, remove the batteries
from it, in order to prevent possible fluid leakage from the battery.
Yamaha cannot be held responsible for damage caused by improper use or modi-
• Keep batteries away from children.                    fications to the instrument, or data that is lost or destroyed.
• Before connecting the instrument to other electronic components, turn off  Always turn the power off when the instrument is not in use.
the power for all components. Before turning the power on or off for all
components, set all volume levels to minimum.       Make sure to discard used batteries according to local regulations.
* The illustrations and LCD screens as shown in this owner’s manual are for in-
structional purposes only, and may be different from the ones on your instru-
ment.
(4)-2                                                                                                   3
Congratulations on your purchase of
the Yamaha PSR-195/PSR-79 PortaTone!
You now own a portable keyboard that combines advanced functions, great
sound and exceptional ease-of-use in a highly compact package.  Its outstanding
features also make it a remarkably expressive and versatile instrument.
Read this Owner’s Manual carefully while playing your new PortaTone in order
to take full advantage of its various features.
Contents
PANEL CONTROLS AND TERMINALS              6           MELODY GUIDE ....................................... 26
l Front Panel ...................................... 6  VOICE CHANGE ........................................ 27
l Rear Panel........................................ 8
SELECTING AND PLAYING STYLES —
SETTING UP                                9         THE STYLE MODE                           28
POWER REQUIREMENTS ............................ 9   SELECTING AND PLAYING A STYLE.......... 28
l Using an AC Power Adaptor ............ 9      STYLE CONTROLS ................................... 30
l Using Batteries ................................. 9  USING THE AUTO ACCOMPANIMENT
TURNING ON THE POWER ........................ 9       FEATURES ............................................. 31
ACCESSORY JACKS .................................. 10  CHANGING THE TEMPO ......................... 31
MUSIC STAND......................................... 10  STYLE SECTIONS (MAIN A, MAIN B) AND
FILL-INS ................................................ 32
GETTING STARTED —                                       ADJUSTING THE ACCOMPANIMENT
PLAYING THE DEMO SONGS                   11               VOLUME .............................................. 32
USING AUTO ACCOMPANIMENT —
PANEL DISPLAY INDICATIONS                12               MULTI FINGERING................................ 33
l Single Finger Chords ..................... 33
PORTABLE GRAND                           13                 l Fingered Chords ............................ 33
WHAT IS A CHORD? ................................ 34
USING THE METRONOME ....................... 13
l Setting the Metronome Time                    WRITING CHORD NAMES ....................... 35
l The Intervals of the Scale ............... 35
Signature ....................................... 14
l Other Chords ................................ 35
l Adjusting the Metronome Volume . 14
ONE TOUCH SETTING (OTS) ................... 36
SELECTING AND PLAYING VOICES —                        CHORD GUIDE.......................................... 37
l Smart ............................................ 37
THE VOICE MODE                           15
l Dictionary...................................... 39
SELECTING AND PLAYING A VOICE ......... 15
MULTI PADS ............................................. 40
l Percussion Voice Chart
(voices 90 and 100). ...................... 17  MIDI                               41
TRANSPOSE AND TUNING ...................... 18
l About MIDI ................................... 41
l Transpose ...................................... 18
l How Can MIDI be Used? ............... 41
l Tuning ........................................... 19
SELECTING AND PLAYING SONGS —
THE SONG MODE                            20
TROUBLESHOOTING...................................... 42
SELECTING AND PLAYING A SONG ......... 20
INDEX ............................................................ 43
CHANGING THE TEMPO ......................... 21
VOICE LIST ..................................................... 44
l About the Beat Display .................. 22
MULTI PAD LIST.............................................. 46
ADJUSTING THE SONG VOLUME ............ 23
SPECIFICATIONS ............................................ 47
SONG CONTROLS .................................. 24
MIDI IMPLEMENTATION CHART..................... 48
A/B REPEAT.............................................. 24
4