На сайте 123390 инструкций общим размером 499.31 Гб , которые состоят из 6234587 страниц
Фото

Руководство пользователя CLAVIA NORD Electro 4D SW61. Основные функции, характеристики и условия эксплуатации изложены на 26 страницах документа в pdf формате.
Доступно к просмотру 25 страниц. Рекомендуем вам скачать файл инструкции, поскольку онлайн просмотр документа может сильно отличаться от оригинала.
User Manual
Nord Electro 4d
OS Version 1.1x
Part No. 50384                                                          Copyright Clavia DMI AB
Print Edition D
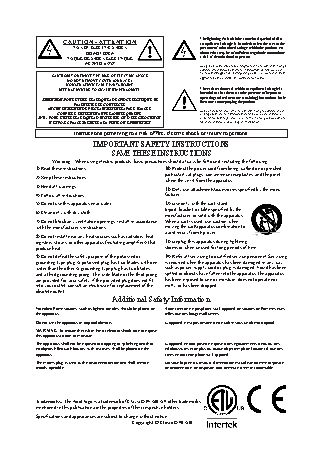
CAUTION - ATTENTION                              The lightning flash with the arrowhead symbol within
an equilateral triangle is intended to alert the user to the
RISK OF ELECTRIC SHOCK                        presence of uninsulated voltage within the products en-
DO NOT OPEN                              closure that may be of sufficient magnitude to constitute
RISQUE DE SHOCK ELECTRIQUE                      a risk of electric shock to persons.
NE PAS OUVRIR
Le symbole eclair avec le point de fleche a l?interieur d?un triangle
equilateral est utilise pour alerter l?utilisateur de la presence a
l?interieur du coffret de ”voltage dangereux” non isole d?ampleur
CAUTION: TO REDUCE THE RISK OF ELECTRIC SHOCK        suffisante pour constituer un risque d`electrocution.
DO NOT REMOVE COVER (OR BACK).
NO USER SERVICEABLE PARTS INSIDE.
REFER SERVICING TO QUALIFIED PERSONNEL.            The exclamation mark within an equilateral triangle is
intended to alert the user to the presence of important
operating and maintenance (servicing) instructions in the
ATTENTION:POUR EVITER LES RISQUES DE CHOC ELECTRIQUE, NE   literature accompanying the product.
PAS ENLEVER LE COUVERCLE.
AUCUN ENTRETIEN DE PIECES INTERIEURES PAR L?USAGER.    Le point d?exclamation a l?interieur d?un triangle equilateral est
CONFIER L?ENTRETIEN AU PERSONNEL QUALIFE.          employe pour alerter l?utilisateur de la presence d?instructions
AVIS: POUR EVITER LES RISQUES D?INCIDENTE OU D?ELECTROCUTION,   importantes pour le fonctionnement et l?entretien (service) dans le
N?EXPOSEZ PAS CET ARTICLE A LA PLUIE OU L?HUMIDITET.  livret d?instructions accompagnant l?appareil.
Instructions pertaining to a risk of fire, electric shock or injury to persons.
IMPORTANT SAFETY INSTRUCTIONS
SAVE THESE INSTRUCTIONS
Warning - When using electric products, basic precautions should always be followed, including the following:
1) Read these instructions.                   10) Protect the power cord from being walked on or pinched
particularly at plugs, convenience receptacles, and the point
2) Keep these instructions.
where they exit from the apparatus.
3) Heed all warnings.
11) Only use attachments/accessories specified by the manu-
4) Follow all instructions.                   facturer.
5) Do not use this apparatus near water.      12) Use only with the cart, stand,
tripod, bracket, or table specified by the
6) Clean only with dry cloth.
manufacturer, or sold with the apparatus.
7) Do not block any ventilation openings. Install in accordance   When a cart is used, use caution when
with the manufacturer’s instructions.         moving the cart/apparatus combination to
avoid injury from tip-over.
8) Do not install near any heat sources such as radiators, heat
registers, stoves, or other apparatus (including amplifiers) that   13) Unplug this apparatus during lightning
produce heat.                                 storms or when unused for long periods of time.
9) Do not defeat the safety purpose of the polarized or   14) Refer all servicing to qualified service personnel. Servicing
grounding-type plug. A polarized plug has two blades with one   is required when the apparatus has been damaged in any way,
wider than the other. A grounding type plug has two blades   such as power-supply cord or plug is damaged, liquid has been
and a third grounding prong. The wide blade or the third prong   spilled or objects have fallen into the apparatus, the apparatus
are provided for your safety. If the provided plug does not fit   has been exposed to rain or moisture, does not operate nor-
into your outlet, consult an electrician for replacement of the   mally, or has been dropped.
obsolete outlet.
Additional Safety Information
No naked flame sources, such as lighted candles, should be placed on   Il convient de ne pas placer sur l?appareil de sources de flammes nues,
the apparatus;                                telles que des bougies allumees;
Do not use the apparatus in tropical climates.  L?appareil n’est pas destine a etre utilise sous un climat tropical.
WARNING: To reduce the risk of fire or electric shock, do not expose
this apparatus to rain or moisture.
The apparatus shall not be exposed to dripping or splashing and that   L?appareil ne doit pas etre expose a des egouttements d?eau ou des
no objects filled with liquids, such as vases, shall be placed on the   eclaboussures et de plus qu?aucun objet rempli de liquide tel que des
apparatus.                                    vases ne doit etre place sur l?appareil.
The maims plug is used as the disconnect device and shall remain   Lorsque la prise du resau d’alimentation est utilisee comme dispositif
readily operable.                             de deconnexion, ce dispositif doit demeure aisement accessible.
Trademarks: The Nord logo is a trademark of Clavia DMI AB. All other trademarks
mentioned in this publication are the properties of their respective holders.
Specifications and appearances are subject to change without notice.
Copyright © Clavia DMI AB
? ?                                                                                                     |? 3
Nord Electro 4D Table of Contents
Piano section   . . . . . . . . . . . . . . . .  .13
1?Introduction                       Clavinet sound   . . . . . . . . . . . . . . . . . .  .13  7?Nord Sound Manager
Pick-up type  . . . . . . . . . . . . . . . . . . . .  .13
Pick-up Type Description   . . . . . . . . . .  .13  Nord Sound Manager  . . . . . . . . . . . . . 20
Thank you!   . . . . . . . . . . . . . . . . . . . . 4
Clav EQ  . . . . . . . . . . . . . . . . . . . . . . . .  .13  System requirements   . . . . . . . . . . . . . 20
About this manual . . . . . . . . . . . . . 4  Acoustics   . . . . . . . . . . . . . . . . . . . . . .  .13  Nord Sample Editor . . . . . . . . . . . . . . . 20
Samp Env  . . . . . . . . . . . . . . . . . . . . . .  .14
Disclaimer  . . . . . . . . . . . . . . . . . . . . . 4
Piano Type . . . . . . . . . . . . . . . . . . . . . .  .14
OS and internal memory  . . . . . . 4  Model   . . . . . . . . . . . . . . . . . . . . . . . . .  .14
Factory presets  . . . . . . . . . . . . . . . . 4  Program section   . . . . . . . . . . . . .  .14  8?MIDI functions
Restoring the factory presets  . . . . . . . . 4  Up/Down buttons  . . . . . . . . . . . . . . . .  .14
Display . . . . . . . . . . . . . . . . . . . . . . . . .  .14  About the MIDI implementation   . . . . .  .21
OS upgrades   . . . . . . . . . . . . . . . . . . 4                    Keyboard velocity  . . . . . . . . . . . . . . . .  .21
Store  . . . . . . . . . . . . . . . . . . . . . . . . . .  .14  Program change  . . . . . . . . . . . . . . . . .  .21
Live Mode  . . . . . . . . . . . . . . . . . . . . . .  .14  MIDI Sysex (System Exclusive)  . . . . . .  .21
Panic  . . . . . . . . . . . . . . . . . . . . . . . . . .  .15
2?Overview                           Instrument selectors  . . . . . . . . . . . . . .  .15  Nord Electro 4D with a seq. . .  .21
Shift . . . . . . . . . . . . . . . . . . . . . . . . . . .  .15  Connections  . . . . . . . . . . . . . . . . . . . .  .21
Octave Shift . . . . . . . . . . . . . . . . . . . . .  .15  Local On/Off  . . . . . . . . . . . . . . . . . . . .  .21
Knobs & buttons  . . . . . . . . . . . . . . 5                         MIDI Channel . . . . . . . . . . . . . . . . . . . .  .21
Knobs  . . . . . . . . . . . . . . . . . . . . . . . . . . 5  Effects   . . . . . . . . . . . . . . . . . . . . . . .  .15  Program Change . . . . . . . . . . . . . . . . .  .21
Selector buttons  . . . . . . . . . . . . . . . . . . 5  EQ  . . . . . . . . . . . . . . . . . . . . . . . . . . . .  .15  Controllers . . . . . . . . . . . . . . . . . . . . . .  .21
On/Off buttons  . . . . . . . . . . . . . . . . . . . 5  Effect 1  . . . . . . . . . . . . . . . . . . . . . . . .  .15  About controllers and “chasing”  . . . . .  .21
Shift button    . . . . . . . . . . . . . . . . . . . . . 5  Effect 2  . . . . . . . . . . . . . . . . . . . . . . . .  .15
Drawbars   . . . . . . . . . . . . . . . . . . . . . . . 5  Speaker/Comp  . . . . . . . . . . . . . . . . . .  .15  Program & Controller dumps . 22
Reverb . . . . . . . . . . . . . . . . . . . . . . . . .  .16  Sending program dumps   . . . . . . . . . . 22
Delay / Reverb   . . . . . . . . . . . . . . . . . .  .16  Sending MIDI Controller dumps  . . . . . 22
Feedback   . . . . . . . . . . . . . . . . . . . . . .  .16  Receive MIDI SysEx dumps   . . . . . . . . 22
3?Connections                        Ping Pong  . . . . . . . . . . . . . . . . . . . . . .  .16  MIDI Controller list . . . . . . . . . . . . . . . . 22
Tempo Tap   . . . . . . . . . . . . . . . . . . . . .  .16
Gain . . . . . . . . . . . . . . . . . . . . . . . . . . .  .16
Audio connections  . . . . . . . . . . . . . 6
Headphones  .  .  .  .  .  .  .  .  .  .  .  .  .  .  .  .  .  .  .  .  .  6  9?Index
Left Out and Right Out  . . . . . . . . . . . . . 6
Monitor In   . . . . . . . . . . . . . . . . . . . . . . . 6  6?The Menus  Index  . . . . . . . . . . . . . . . . . . . . . . . . . .  .24
MIDI Connections . . . . . . . . . . . . . . 6                         Index  . . . . . . . . . . . . . . . . . . . . . . . . . .  .24
MIDI In . . . . . . . . . . . . . . . . . . . . . . . . . . 6  System Menu . . . . . . . . . . . . . . . . .  .17
MIDI Out  . . . . . . . . . . . . . . . . . . . . . . . . 6
1 - Memory Protect – On, Off  . . . . . . .  .17
USB Connection   . . . . . . . . . . . . . . . 6  2 - Output Routing   . . . . . . . . . . . . . . .  .17
3 - Transpose   . . . . . . . . . . . . . . . . . . .  .17
Pedal Connections . . . . . . . . . . . . . 7  4 - Fine Tune  . . . . . . . . . . . . . . . . . . . .  .17
Sustain Pedal   . . . . . . . . . . . . . . . . . . . . 7  5 - Sustain Pedal Polarity  . . . . . . . . . .  .17
Rotor Pedal  . . . . . . . . . . . . . . . . . . . . . . 7  6 - Rotor Pedal Polarity . . . . . . . . . . . .  .17
Control Pedal   . . . . . . . . . . . . . . . . . . . . 7
7 - Sustain Pedal Mode . . . . . . . . . . . .  .17
8 - Rotor Pedal Mode  . . . . . . . . . . . . .  .17
9 - Ctrl Pedal Type . . . . . . . . . . . . . . . .  .17
4?Getting Started                    10 - Ctrl Pedal Mode . . . . . . . . . . . . . .  .18
11 - Organ Trig Mode   . . . . . . . . . . . . .  .18
About the programs  . . . . . . . . . . . 8  MIDI Menu . . . . . . . . . . . . . . . . . . . .  .18
1 - Local Control  . . . . . . . . . . . . . . . . .  .18
Selecting programs   . . . . . . . . . . . 8  2 - MIDI Interface . . . . . . . . . . . . . . . . .  .18
Edit a program   . . . . . . . . . . . . . . . . 8  3 - MIDI Channel  . . . . . . . . . . . . . . . . .  .18
4 - Lower Channel . . . . . . . . . . . . . . . .  .18
Selecting pianos, samples  . . . . 8  5 - Control Change (CC) Mode  . . . . . .  .18
Using the Organ . . . . . . . . . . . . . . . 9  6 - Program Change Mode  . . . . . . . . .  .18
7 - MIDI Split Mode  . . . . . . . . . . . . . . .  .18
The Rotary effect  . . . . . . . . . . . . . . 9  8 - Dump One  . . . . . . . . . . . . . . . . . . .  .18
Memory Protection  . . . . . . . . . . . . 9  9 - Dump All   . . . . . . . . . . . . . . . . . . . .  .18
10 - Send CC   . . . . . . . . . . . . . . . . . . .  .18
Storing a program . . . . . . . . . . . .  .10
B3 Menu   . . . . . . . . . . . . . . . . . . . . .  .19
The Live buffer  . . . . . . . . . . . . . . .  .10
1 - Tonewheel Mode  . . . . . . . . . . . . . .  .19
Octave Shift  . . . . . . . . . . .  . 10  2 - Key Click Level . . . . . . . . . . . . . . . .  .19
3 - Key Bounce    . . . . . . . . . . . . . . . . .  .19
Adding effects . . . . . . . . . . . . . . . .  .10  4 - Perc . Fast Decay  . . . . . . . . . . . . . .  .19
Activate an amplifier emulation  . . . . . .  .10  5 - Perc . Slow Decay . . . . . . . . . . . . . .  .19
The Delay   . . . . . . . . . . . .  . 10  6 - Perc . Norm Level  . . . . . . . . . . . . . .  .19
7 - Perc . Soft Level  . . . . . . . . . . . . . . .  .19
8 - Perc Drawbar 9 Cancel  . . . . . . . . .  .19
Rotary Menu  . . . . . . . . . . . . . . . . .  .19
5?Nord Electro 4D Reference          1- Rotary Model   . . . . . . . . . . . . . . . . .  .19
2 - Balance Bass/Horn  . . . . . . . . . . . .  .19
Master level knob    . . . . . . . . . . 11  3 - Treble Horn Speed . . . . . . . . . . . . .  .19
4 - Bass Rotor Speed  .  .  .  .  .  .  .  .  .  .  .  .  .  .19
Organ section  . . . . . . . . . . . . . . . .  .11  5 - Treble Horn Acceleration  . . . . . . . .  .19
Organ Model button  . . . . . . . . . . . . . .  .11  6 - Bass Rotor Acceleration   . . . . . . . .  .19
The B3 model  . . . . . . . . . . . . . . . . . . .  .11
The VX model  . . . . . . . . . . . . . . . . . . .  .11
The Farf model  . . . . . . . . . . . . . . . . . .  .11
Rotary Speed    . . . . . . . . . . .  . 12
Vibrato/Chorus  . . . . . . . . . . .  . 12
Percussion   . . . . . . . . . . . . .  . 12
Preset/Drawbar/Split    . . . . . . .  . 12
Additional MIDI keyboard  . . . . . . . . . .  .13
The drawbars    . . . . . . . . . . .  . 13