На сайте 123429 инструкций общим размером 499.45 Гб , которые состоят из 6236153 страниц
Фото
Руководство пользователя INVOLIGHT BL4650Z. Основные функции, характеристики и условия эксплуатации изложены на 3 страницах документа в pdf формате.
Доступно к просмотру 3 страницы. Рекомендуем вам скачать файл инструкции, поскольку онлайн просмотр документа может сильно отличаться от оригинала.
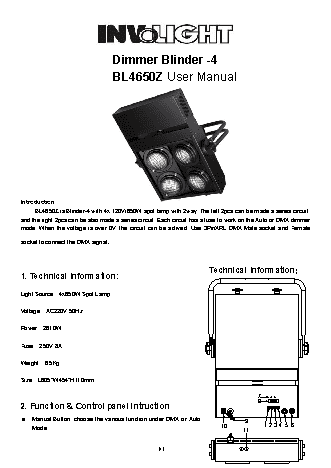
Dimmer Blinder -4
BL4650Z User Manual
Introduction:
BL4650Z is Blinder-4 with 4x 120V/650W spot lamp with 2way. The left 2pcs can be made a series circuit,
and the right 2pcs can be also made a series circuit. Each circuit has a fuse to work on the Auto or DMX dimmer
mode. When the voltage is over 0V, the circuit can be actived. Use 3PinXRL DMX Male socket and Female
socket to connect the DMX signal?
Technical Information:
1. Technical Information:
Light Source:4x650W Spot Lamp
Voltage:AC220V 50Hz
Power:2610W
Fuse:250V 8A
Weight:6.5Kg
Size:L605*W454*H110mm
7
8
2. Function & Control panel intruction
l    Manual Button: choose the various function under DMX or Auto                9
Mode.                                                              10       11     1  2  3  4  5  6
1/1
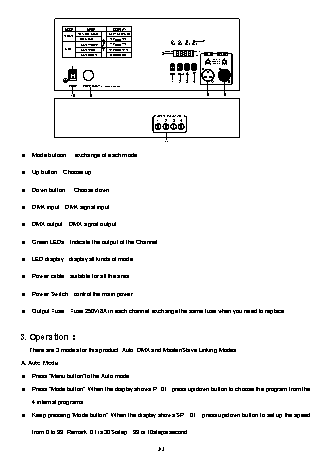
MODE    MENU      DI SPLAY
TOTAL DMX CHANNEL  CH: 01/ CH: 02/ CH: 04
RECEI VE
DMX  CHANNEL  R001  R512                    7
CHASE PROGRAM  P: 01  P: 16     1CH  2CH  3CH  4CH
CHASE  CHASE SPEED  SP: 01  SP: 16
I
CHASE DI MMER  D000  D100    8  DMX  Si gnal  Recei ve  DMX N  DMX  OUT
Chase
3  1=Ground  3
2=Dat a" - "
3=Dat a" +"
1  2  2  1
MODE MENU
1  2  3  4
POWER  POWER NPUT: AC 120V- 60Hz, 20A Max
I
10    9                                         5      6
FUSES: F6. 3A 250V 5*20mm
1  2  3  4
11
l    Mode butoon:  exchange of each mode.
l    Up button:Choose up.
l    Down button:   Choose down.
l    DMX input:DMX signal input.
l    DMX output:DMX signal output.
l    Green LEDs:Indicate the output of the Channel
l    LED display:display all kinds of mode.
l    Power cable:suitable for all the area.
l    Power Switch:control the main power.
l    Output Fuse:Fuse 250V/8A in each channel, exchange the same fuse when you need to replace.
3. Operation:
There are 3 modes for this product, Auto, DMX and Master/Slave Linking Modes.
A. Auto Mode:
l    Press “Menu button”to the Auto mode.
l    Press “Mode button”. When the display shows P:01,press up/down button to choose the program from the
4 internal programs.
l    Keep pressing “Mode button”. When the display shows SP:01,press up/down button to set up the speed
from 0 to 99. Remark: 01 is 30S/step,99 is 10steps/second.
2/2
l    Keep pressing “Mode button”. When the display shows D001,press up/down button to set up the brightness
from 0 to 100. Remark:  0 is no light, 100 is the most bright.
B. DMX Mode:
l    Press “Menu button”to the DMX mode.
l    Press“Mode button”. When the display shows A001,press up/down button to set up the DMX address from
0 to 511. Remark: do not set up 512.
l  Press“Mode button”. When the display shows CH01 or CH02, press up/down button to set up the Channel,
CH01 means 4xspot lamps are controlled by 1 way DMX signal to make the dim,CH02 means 4xspot
lamps are separately controlled by 2 way DMX signals to make the dim.
C. Master/Slave Linking Mode:
There must be 1pc in the Auto mode in all of the equipments, and the others set up to the DMX mode, And
all the DMX address must be set up to A001. Otherwise, the linking mode cannot be use.
4. Products instruction:
1. Open the carton and make sure that the cargo is in the good condition, if there is any broken or problem,
please contact the local distributor.
2. When you install the lamps, please cut off the power. Please do not touch the lamps or Light fixture when it
is light on.
3.  Please keep the fixture in the ventilated place and take it away from the flammable and combustible
material.
4. Check the local power is same as the fixture.
5. Please be sure that you will cut off the power and cool the fixture before bulb replacement. When it is cool
down, please open the cover and replace the lamp. Also be sure to lock the cover after the replacement.
5. Caution:
l  Please read this user manual before usage and follow up our struction for the operation.
l    This fixture can be used under the temperature 40?.
l  Please must be cut off the power and cool down the fixture to replace the lamp bulbs.
l  Please do not touch the light fixture when you switch on the power.
l    Please contact the certificated engineer for the maintain and service.
l  Please replace the lamp bulb and other accessories as per our standard.
l    If the lamp burned or problem, please replace the lamp right away. Please hang it in the upside when you
install the fixture. Please be sure to get the certificated electrician to install the fixture. If there is no
electrician in the public, please do not use it.
l    Please do not expose it in the damp, drops, or rain place and keep it away from the flammable and
combustible material.
l    Please be sured it is earth linked.
3/3