На сайте 123379 инструкций общим размером 499.27 Гб , которые состоят из 6234097 страниц
Фото

Руководство пользователя YAMAHA QL5. Основные функции, характеристики и условия эксплуатации изложены на 58 страницах документа в pdf формате.
Доступно к просмотру 57 страниц. Рекомендуем вам скачать файл инструкции, поскольку онлайн просмотр документа может сильно отличаться от оригинала.
Руководство пользователя
Храните это руководство, чтобы можно было обращаться к нему в дальнейшем.
RU
Содержание                                          Краткое руководство............................. 34
Подключение устройств .................................................34
Настройка входных каналов .........................................35
ПРАВИЛА ТЕХНИКИ БЕЗОПАСНОСТИ .....5                   Передача сигнала входного канала
на шину STEREO .........................................................36
Применение эквалайзера/динамического
Введение.....................................................8  процессора..................................................................36
Принадлежности ..................................................................8  Настройка выходных каналов......................................37
О служебном программном обеспечении................8  Применение графического эквалайзера (GEQ)....37
Об обновлениях микропрограмм ................................8  Использование функции Automixer ..........................38
О Руководстве пользователя..........................................8  Применение эффектов.....................................................38
Обозначения в этом руководстве ................................8  Изменение настроек подключения ...........................40
Группирование и связывание ......................................41
Применение двусторонней связи ..............................41
Общие сведения о консоли серии QL ....9
Маршрутизация осциллятора
Характеристики.....................................................................9  на выходной канал...................................................42
О моделях...............................................................................10  Использование ячеек памяти сцен............................42
Запись и воспроизведение аудиофайлов
с использованием флэш-памяти USB...............43
Элементы управления и функции........11
Сохранение и загрузка настроек модуля................44
Верхняя панель ...................................................................11
Передняя панель................................................................15
Прочие функции ..................................... 45
Задняя панель......................................................................16
Настройка яркости сенсорного экрана,
ламп и других индикаторов.................................45
Сенсорный экран.....................................18
Установка даты и времени встроенных часов......45
Основные операции на сенсорном экране............18  Инициализация модуля с восстановлением
Экранный пользовательский интерфейс................18   заводских настроек по умолчанию..................46
Представление сенсорного экрана...........................20  Регулировка фейдеров
Использование кнопок инструментов.....................21  (функция калибровки)............................................46
Поиск и устранение
Основные операции на консоли                        неисправностей ...................................... 48
серии QL....................................................22  Установка комплекта для
монтажа в стойке RK1
Управление выбранными каналами
(секция Selected Channel)......................................22  (продается отдельно)............................. 50
Использование верхней панели                      Общие характеристики ......................... 51
(вертикальная секция канала)............................22
Габариты.................................................. 52
Назначение названия.......................................................23
Использование библиотек.............................................24  Предметный указатель ......................... 53
Инициализация настроек...............................................28
Блок-схема.................Конец руководства
Копирование и вставка настроек ...............................28
Сравнение двух наборов настроек............................29  Схема уровня.............Конец руководства
Подключение ...........................................30
О сетевых подключениях................................................30
Подключение к устройствам ввода-вывода ..........30
Подключения аудиовходов/аудиовыходов...........32
Установка дополнительной платы .............................33
2                     Руководство пользователя
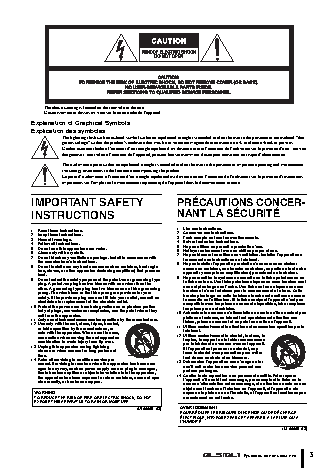
The above warning is located on the rear/side of the unit.
L’avertissement ci-dessus est situe sur le arriere/cote de l’appareil.
Explanation of Graphical Symbols
Explication des symboles
The lightning flash with arrowhead symbol within an equilateral triangle is intended to alert the user to the presence of uninsulated “dan-
gerous voltage” within the product’s enclosure that may be of sufficient magnitude to constitute a risk of electric shock to persons.
L’eclair avec une fleche a l’interieur d’un triangle equilateral est destine a attirer l’attention de l’utilisateur sur la presence d’une « tension
dangereuse » non isolee a l’interieur de l’appareil, pouvant etre suffisamment elevee pour constituer un risque d’electrocution.
The exclamation point within an equilateral triangle is intended to alert the user to the presence of important operating and maintenance
(servicing) instructions in the literature accompanying the product.
Le point d’exclamation a l’interieur d’un triangle equilateral est destine a attirer l’attention de l’utilisateur sur la presence d’instructions
importantes sur l’emploi ou la maintenance (reparation) de l’appareil dans la documentation fournie.
IMPORTANT SAFETY                                     PRECAUTIONS CONCER-
INSTRUCTIONS                                         NANT LA SECURITE
1  Lire ces instructions.
1  Read these instructions.                          2  Conserver ces instructions.
2  Keep these instructions.                          3  Tenir compte de tous les avertissements.
3  Heed all warnings.                                4  Suivre toutes les instructions.
4  Follow all instructions.                          5  Ne pas utiliser ce produit a proximite d’eau.
5  Do not use this apparatus near water.             6  Nettoyer uniquement avec un chiffon propre et sec.
6  Clean only with dry cloth.                        7  Ne pas bloquer les orifices de ventilation. Installer l’appareil con-
7  Do not block any ventilation openings. Install in accordance with   formement aux instructions du fabricant.
the manufacturer’s instructions.
8  Do not install near any heat sources such as radiators, heat regis-  8  Ne pas installer l’appareil a proximite d’une source de chaleur
comme un radiateur, une bouche de chaleur, un poele ou tout autre
ters, stoves, or other apparatus (including amplifiers) that produce   appareil (y compris un amplificateur) produisant de la chaleur.
heat.
9  Do not defeat the safety purpose of the polarized or grounding-type   9  Ne pas modifier le systeme de securite de la fiche polarisee ou de
la fiche de terre. Une fiche polarisee dispose de deux broches dont
plug. A polarized plug has two blades with one wider than the   une est plus large que l’autre. Une fiche de terre dispose de deux
other. A grounding type plug has two blades and a third grounding   broches et d’une troisieme pour le raccordement a la terre. Cette
prong. The wide blade or the third prong are provided for your   broche plus large ou cette troisieme broche est destinee a assurer
safety. If the provided plug does not fit into your outlet, consult an   la securite de l’utilisateur. Si la fiche equipant l’appareil n’est pas
electrician for replacement of the obsolete outlet.
10 Protect the power cord from being walked on or pinched particu-  compatible avec les prises de courant disponibles, faire remplacer
les prises par un electricien.
larly at plugs, convenience receptacles, and the point where they   10 Acheminer les cordons d’alimentation de sorte qu’ils ne soient pas
exit from the apparatus.
11 Only use attachments/accessories specified by the manufacturer.  pietines ni coinces, en faisant tout specialement attention aux
fiches, prises de courant et au point de sortie de l’appareil.
12 Use only with the cart, stand, tripod, bracket,   11 Utiliser exclusivement les fixations et accessoires specifies par le
or table specified by the manufacturer, or          fabricant.
sold with the apparatus. When a cart is used,     12 Utiliser exclusivement le chariot, le stand, le
use caution when moving the cart/apparatus          trepied, le support ou la table recommandes
combination to avoid injury from tip-over.
13 Unplug this apparatus during lightning              par le fabricant ou vendus avec cet appareil.
Si l’appareil est pose sur un chariot, dep-
storms or when unused for long periods of           lacer le chariot avec precaution pour eviter
time.
tout risque de chute et de blessure.
14 Refer all servicing to qualified service per-     13 Debrancher l’appareil en cas d’orage ou lor-
sonnel. Servicing is required when the apparatus has been dam-  squ’il doit rester hors service pendant une
aged in any way, such as power-supply cord or plug is damaged,   periode prolongee.
liquid has been spilled or objects have fallen into the apparatus,   14 Confier toute reparation a un personnel qualifie. Faire reparer
the apparatus has been exposed to rain or moisture, does not oper-  l’appareil s’il a subi tout dommage, par exemple si la fiche ou le
ate normally, or has been dropped.
cordon d’alimentation est endommage, si du liquide a coule ou des
objets sont tombes a l’interieur de l’appareil, si l’appareil a ete
WARNING                                               expose a la pluie ou a de l’humidite, si l’appareil ne fonctionne pas
TO REDUCE THE RISK OF FIRE OR ELECTRIC SHOCK, DO NOT   normalement ou est tombe.
EXPOSE THIS APPARATUS TO RAIN OR MOISTURE.
(UL60065_03)    AVERTISSEMENT
POUR REDUIRE LES RISQUES D’INCENDIE OU DE DECHARGE
ELECTRIQUE, N’EXPOSEZ PAS CET APPAREIL A LA PLUIE OU A
L’HUMIDITE.
(UL60065_03)
Руководство пользователя  3