На сайте 123401 инструкция общим размером 499.33 Гб , которые состоят из 6234961 страницы
Фото
Руководство пользователя PIONEER CDJ-500S. Основные функции, характеристики и условия эксплуатации изложены на 86 страницах документа в pdf формате.
Доступно к просмотру 86 страниц. Рекомендуем вам скачать файл инструкции, поскольку онлайн просмотр документа может сильно отличаться от оригинала.
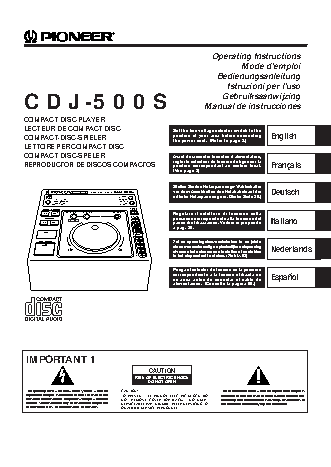
R Operating Instructions Mode d’emploi Bedienungsanleitung Istruzioni per l’uso Gebruiksaanwijzing CDJ-500S Manual de instrucciones COMPACT DISC PLAYER LECTEUR DE COMPACT DISC Set the line voltage selector switch to the COMPACT-DISC-SPIELER position of your area before connecting English the power cord. (Refer to page 2.) LETTORE PER COMPACT DISC COMPACT DISC-SPELER Avant de raccorder le cordon d’alimentation, REPRODUCTOR DE DISCOS COMPACTOS regler le selecteur de tension de ligne sur la Francais position correspondant au secteur local. (Voir page 2) Stellen Sie den Netzspannungs-Wahlschalter PROFESSIONAL COMPACT DISC PLAYER CDJ-500S vor dem Anschlie?en des Netzkabels auf die Deutsch D TEMPO ortliche Netzspannung ein. (Siehe Seite 30.) ' ± 10/± 16 TIME AUTO MASTER MODE CUE TEMPO TRACK SEARCH EJECT IN/REAL TIME CUE OUT/EXIT RELOOP 4 ? 0 Regolare il selettore di tensione sulla LOOP TEMPO SEARCH posizione corrispondente alla tensione del OUT ADJUST Italiano – 1 ? paese di utilizzazione. Vedere in proposito a pag. 30. CUE PLAY/PAUSE Zet de spanningskeuzeschakelaar in de juiste 6 stand overeenkomstig de plaatselijke netspanning – + Nederlands REV FWD alvorens het netsnoer aan te sluiten of de stekker + in het stopcontact te steken. (Zie blz. 58) Ponga el selector de tension en la posicion correspondiente a la tension utilizada en Espanol su zona antes de conectar el cable de alimentacion. (Consulte la pagina 58.) ' IMPORTANT 1 CAUTION RISK OF ELECTRIC SHOCK DO NOT OPEN The lightning flash with arrowhead symbol, within an CAUTION: The exclamation point within an equilateral triangle is equilateral triangle, is intended to alert the user to the TO PREVENT THE RISK OF ELECTRIC SHOCK, DO intended to alert the user to the presence of important presence of uninsulated "dangerous voltage" within the NOT REMOVE COVER (OR BACK). NO USER- operating and maintenance (servicing) instructions in product's enclosure that may be of sufficient magnitude SERVICEABLE PARTS INSIDE. REFER SERVICING TO the literature accompanying the appliance. to constitute a risk of electric shock to persons. QUALIFIED SERVICE PERSONNEL. 3En/Fr
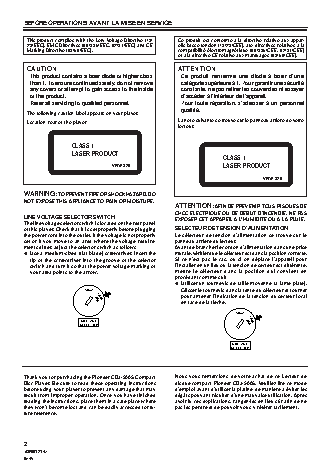
BEFORE OPERATIONS/AVANT LA MISE EN SERVICE This product complies with the Low Voltage Directive (73/ Ce produit est conforme a la directive relative aux appar- 23/EEC), EMC Directives (89/336/EEC, 92/31/EEC) and CE eils basse tension (73/23/CEE), aux directives relatives a la Marking Directive (93/68/EEC). compatibilite electromagnetique (89/336/CEE, 92/31/CEE) et a la directive CE relative aux marquages (93/68/CEE). CAUTION ATTENTION This product contains a laser diode of higher class Ce produit renferme une diode a laser d’une than 1. To ensure continued safety, do not remove categorie superieure a 1. Pour garantir une securite any covers or attempt to gain access to the inside constante, ne pas retirer les couvercles ni essayer of the product. d’acceder a l’interieur de l’appareil. Refer all servicing to qualified personnel. Pour toute reparation, s’adresser a un personnel qualifie. The following caution label appears on your player. La note suivante se trouve sur le panneau arriere de votre Location: rear of the player lecteur. CLASS 1 LASER PRODUCT CLASS 1 VRW-328 LASER PRODUCT VRW-328 WARNING: TO PREVENT FIRE OR SHOCK HAZARD, DO NOT EXPOSE THIS APPLIANCE TO RAIN OR MOISTURE. ATTENTION: AFIN DE PREVENIR TOUS RISQUES DE CHOC ELECTRIQUE OU DE DEBUT D’INCENDIE, NE PAS LINE VOLTAGE SELECTOR SWITCH EXPOSER CET APPAREIL A L'HUMIDITE OU A LA PLUIE. The line voltage selector switch is located on the rear panel of this player. Check that it is set properly before plugging SELECTEUR DE TENSION D’ALIMENTATION the power cord into the outlet. If the voltage is not properly Le selecteur de tension d’alimentation se trouve sur le set or if you move to an area where the voltage require- panneau arriere du lecteur. ments differ, adjust the selector switch as follows: Avant de brancher le cordon d’alimentation dans une prise ¶ Use a medium-sized (flat blade) screwdriver. Insert the murale, verifier que le selecteur est dans la position correcte. tip of the screwdriver into the groove of the selector Si ce n’est pas le cas, ou si on deplace l’appareil pour switch and turn it so that the power voltage marking of l’installer en un lieu ou la tension de secteur est differente, your area points to the arrow. mettre le selecteur dans la position qui convient en procedant comme suit: ¶ Utiliser un tournevis de taille moyenne (a lame plate). Glisser le tournevis dans la fente du selecteur et tourner 240V 220- 230V pour amener l’indication de la tension du secteur local en face de la fleche. VOLTAGE 240V 220- 230V SELECTOR VOLTAGE SELECTOR Thank you for purchasing the Pioneer CDJ-500S Compact Nous vous remercions de votre achat de ce Lecteur de Disc Player. Be sure to read these operating instructions disque compact Pioneer CDJ-500S. Veuillez lire ce mode before using your player to prevent any damage that may d’emploi avant d’utiliser la platine de maniere a eviter les result from improper operation. Once you have finished degats pouvant resulter d’une mauvaise utilisation. Apres reading the instructions, place them in a safe place where avoir lu ces explications, rangez-les en lieu sur afin de ne they won’t become lost and can be easily accessed for fu- pas les perdre et de pouvoir vous y referer facilement. ture reference. 2En/Fr
BEFORE OPERATIONS/AVANT LA MISE EN SERVICE CONTENTS TABLE DES MATIERES CAUTIONS REGARDING HANDLING............................... 3 PRECAUTIONS CONCERNANT LA MANIPULATION ...... 3 Mounting Rack .................................................................. 5 Montage en baie ............................................................... 5 FEATURES ......................................................................... 6 PARTICULARITES .............................................................. 6 CONNECTIONS ................................................................. 9 CONNEXIONS ................................................................... 9 PANEL FACILITIES........................................................... 11 NOMENCLATURE DES PANNEAUX .............................. 11 Top Panel ......................................................................... 11 Panneau superieur .......................................................... 11 Display Window .............................................................. 13 Fenetre d’affichage ......................................................... 13 ORDINARY CD PLAYER OPERATIONS ........................... 14 UTILISATION ORDINAIRE DU LECTEUR CD .................. 14 Setting the Auto Cue Function ON/OFF ......................... 14 Mise en/hors service de la fonction Playback Operations ....................................................... 14 Attaque Automatique ..................................................... 14 To Stop Play .................................................................... 14 Demarches pour la lecture ............................................. 14 To Pause Play .................................................................. 15 Arret de la lecture............................................................ 14 Track Cueing .................................................................... 15 Interruption temporaire de la lecture ............................. 15 Fast-Forward/Fast-Reverse ............................................. 15 Recherche d’une plage ................................................... 15 DJ PLAYER OPERATION ................................................. 16 Avance rapide/Recul rapide ............................................ 15 Playback Operations with Auto Cue Function ON ............. 16 UTILISATION DU LECTEUR DJ ...................................... 16 Cueing by Frames ........................................................... 16 Operations de lecture avec la fonction Setting a Cue Point ......................................................... 17 Attaque Automatique en service .................................... 16 SPECIAL DISC JOCKEY TECHNIQUES ........................... 18 Recherche par images .................................................... 16 Jog Dial Functions .......................................................... 18 Reglage d’un point d’attaque ......................................... 17 Master Tempo ................................................................. 19 TECHNIQUES SPECIALES “DISC JOCKEY” .................. 18 Loop Play ......................................................................... 19 Fonctions de la molette pas-a-pas ................................. 18 Cueing ............................................................................. 19 Tempo principal .............................................................. 19 Fader Start Playback ....................................................... 21 Lecture en boucle............................................................ 19 Relay Play Using Two Players ........................................ 21 Reglage du point d’attaque ............................................ 19 ADVANCED TECHNIQUES ............................................. 22 Lecture a depart en fondu .............................................. 21 MIXING DIFFERENT TRACKS ......................................... 24 Lecture a relais avec deux lecteurs ................................ 21 TROUBLESHOOTING...................................................... 26 TECHNIQUES EVOLUEES .............................................. 22 SPECIFICATIONS............................................................. 29 MIXAGE DE PLAGES DIFFERENTES .............................. 24 GUIDE DE DEPANNAGE ................................................. 27 CARACTERISTIQUES TECHNIQUES .............................. 29 CAUTIONS REGARDING PRECAUTIONS CONCERNANT LA HANDLING MANIPULATION Location Emplacement Install the player in a well-ventilated location where it will Installer le lecteur dans un endroit bien ventile a l’abri d’une not be exposed to high temperatures or humidity. temperature ou d’une humidite elevee. Do not install the player in a location which is exposed to direct Ne pas installer le lecteur dans un endroit directement expose sunlight, or near stoves or radiators. Excessive heat can adversely aux rayons du soleil ou a proximite d’appareils de chauffage ou affect the cabinet and internal components. Installation of the de radiateurs. Une chaleur excessive peut avoir des consequences player in a damp or dusty environment may aiso result in a mal- nefastes pour le coffret et les composants internes. L’installation function and can be hazardous. Avoid installation near cookers du lecteur dans un local humide ou poussiereux pourrait etc., where the player may be exposed to oily smoke, steam or provoquer un fonctionnement defectueux ou un accident. Eviter heat. de l’installer pres d’ustensiles de cuisine, etc. ou il pourrait etre expose a de la fumee huileuse, de la vapeur ou la chaleur. Installation guidelines Conseils concernant l’installation ? Placing and using the compact disc player for long periods on heat-generating sources such as amplifiers or near spotlights, ? Conserver ou utiliser le lecteur pendant de longues periodes etc. will affect product performance. Avoid placing the player alors qu’il se trouve sur un appareil degageant de la chaleur on heat-generating sources. tel qu’un amplificateur, ou au voisinage d’une source de chaleur ? Install this compact disc player as far as possible away from telle qu’un projecteur, etc., peuvent en alterer ses performances. tuners and TV sets. A compact disc player installed in close Eviter de placer le lecteur sur des sources generant de la proximity to such equipment may cause noise or degradation chaleur, comme des amplificateurs. of the picture. ? Installer ce lecteur de disque compact aussi loin que possible ? Noise may be noticeable when an indoor antenna is used. In de syntoniseurs et de televiseurs. such cases, make use of an outdoor antenna or turn off power Un lecteur de disque compact installe a proximite de tels to the compact disc player. appareils peut provoquer des parasites ou une deterioration des images. 3En/Fr