На сайте 123431 инструкция общим размером 499.45 Гб , которые состоят из 6236163 страниц
Фото
Руководство пользователя M-AUDIO Classroom Studio. Основные функции, характеристики и условия эксплуатации изложены на 8 страницах документа в pdf формате.
Доступно к просмотру 8 страниц. Рекомендуем вам скачать файл инструкции, поскольку онлайн просмотр документа может сильно отличаться от оригинала.
Classroom
Studio Bundle
Quick Start Guide
English
M-Audio Classroom Bundle QuickStart Guide
Introduction
The M-Audio  Classroom Bundle is  a special collection  of hardware and software that allows you to create
professional recordings using a standard PC or Mac computer. The contents of the M-Audio Classroom Bundle are
as follows:
1.  M-Audio MobilePre USB Audio Interface: This compact USB device allows your computer to record
audio from a variety of sources. (In this QuickStart, you will be recording from 2 microphones.)
2.  USB Cable: Used to connect the MobilePre USB to your computer.
3.  2 M-Audio Nova Condenser Microphones: Rugged microphones with exceptional frequency response
suitable for almost all recording applications.
4.  2 Hard Mounts: Used for attaching the Nova microphones to mic stands.
5.  2 XLR cables: Used to connect the Nova microphones to the MobilePre USB.
6.  Ableton Live Lite Software: An exclusive version of Ableton’s renowned audio sequencing instrument.
This is the software that will be used for recording audio into your computer.
7.  ProSessions Demo CD: A collection of samples and loops from the ProSessions Sample CD catalog.
8.  M-Audio Driver CD: Contains software drivers that allow the MobilePre USB to be used with your
computer’s operating system.
9.  QuickStart Guide: The document you’re reading now. This QuickStart will guide you through the
process of setting up the hardware and software, and making your first recording.
The MobilePre USB, Nova microphones, and Live Lite all have their own user’s manuals, and it is recommended
that you read  these manuals for more information  on the products. Since this QuickStart will get you up and
running quickly,  it  does not explain  every function of the  products used. While the MobilePre USB contains a
printed manual, the manuals for Live Lite can be found in the Help menu of the program.
Hardware and Software Installation
1.  Install the MobilePre USB: Directions for installing the MobilePre USB are contained in the MobilePre
USB User’s Manual. Once the driver is installed, connect the MobilePre USB to your computer using the
supplied USB cable. If the MobilePre USB is connected properly, the blue “Power” light will illuminate.
2.  Install Ableton Live Lite: Insert the Live Lite CD into your CD-ROM drive.
•   PC users: This will likely launch a new window of the CD contents which will display an executable file (if
this window does not appear, simply browse to your CD-ROM drive to view the CD contents). Double-
click the executable file to launch the installer then follow the onscreen prompts. Upon completion, a new
program group will appear in your Start > Programs menu containing the icon to launch Live Lite.
•   Mac users: The CD will display two different file folders, one for OS 9 users, the other for OS X users.
Click and drag the folder corresponding to your operating system onto your hard drive. Live Lite will then
be copied onto the computer. To launch Live Lite, open the Live Lite folder on your computer’s hard drive
and double-click the Live Lite icon. PC users: There will be a file on the CD named “Setup.” Double-click
this file to launch the installer then follow the onscreen prompts. Upon completion, a new program group
will appear in your Start > Programs menu containing the icon to launch Live Lite
a)  PC Users
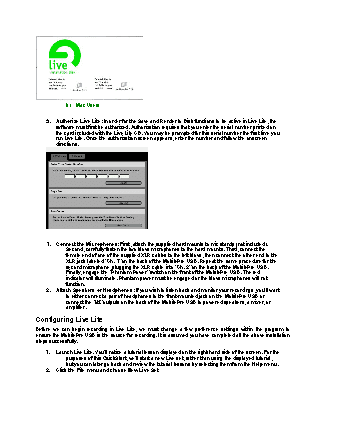
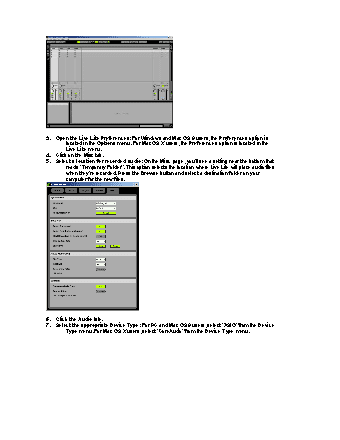
b)  Mac Users
3.  Authorize Live Lite: In order for the Save and Render to Disk functions to be active in Live Lite, the
software must first be authorized. Authorization requires that you enter the serial number printed on
the card included with the Live Lite CD. You may be prompted for this serial number the first time you
run Live Lite. Once the authorization screen appears, enter the number and follow the onscreen
directions.
1.  Connect the Microphones: First, attach the supplied hard mounts to mic stands (not included).
Second, carefully fasten the two Nova microphones to the hard mounts. Third, connect the
female end of one of the supplied XLR cables to the left Nova, then connect the other end to the
XLR jack labeled “Ch. 1” on the back of the MobilePre USB. Repeat the same procedure for the
second microphone, plugging the XLR cable into “Ch. 2” on the back of the MobilePre USB.
Finally, engage the “Phantom Power” switch on the front of the MobilePre USB. The red
indicator will illuminate. Phantom power must be engaged or the Nova microphones will not
function.
2.  Attach Speakers or Headphones: If you wish to listen back and monitor your recordings, you’ll want
to either connect a pair of headphones to the front-mounted jack on the MobilePre USB or
connect the 1/4” outputs on the back of the MobilePre USB to powered speakers, a mixer, or
amplifier.
Configuring Live Lite
Before we can begin recording in Live Lite, we must change  a few preference settings within the program  to
ensure the MobilePre USB is the source for recording. It is assumed you have completed all the above installation
steps successfully.
1.  Launch Live Lite. You’ll notice a tutorial lesson displayed on the right-hand side of the screen. For the
purposes of this QuickStart, we’ll start a new Live set, rather than using the displayed tutorial,
but you can later go back and review the tutorial lessons by selecting them from the Help menu.
2.  Click the File menu and choose New Live Set