На сайте 123411 инструкций общим размером 499.36 Гб , которые состоят из 6235346 страниц
Фото
Руководство пользователя BOSCH PKV 975 DC1D. Основные функции, характеристики и условия эксплуатации изложены на 52 страницах документа в pdf формате.
Доступно к просмотру 52 страницы. Рекомендуем вам скачать файл инструкции, поскольку онлайн просмотр документа может сильно отличаться от оригинала.
Owner’s Manual
Manuel de l’utilisation
Bedienungsanleitung
Manuale di Istruzioni
Manual de Instrucciones
Gebruiksaanwijzing
Instruktionsbok
Инструкция Пользователя
RC-06
Stereo Control Ampli?er
Preampli?cateur Stereo
Stereo-Vorverstarker
Preampli?catore Stereo
Preampli?cador Estereofonico
Stereo Voorversterker
Stereoforsteg
Стерео интегрированный усилитель
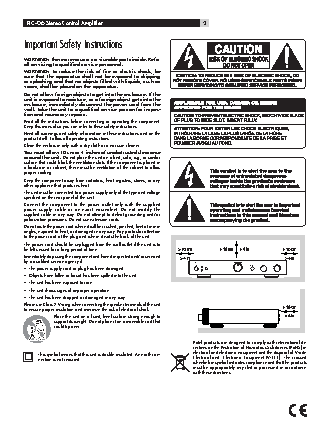
RC-06 Stereo Control Amplifier                                 2
Important Safety Instructions
WARNING: There are no user serviceable parts inside. Refer
all servicing to qualified service personnel.
WARNING: To reduce the risk of fire or electric shock, be
sure that the apparatus shall not be exposed to dripping
or splashing and that no objects filled with liquids, such as
vases, shall be placed on the apparatus.
Do not allow foreign objects to get into the enclosure. If the
unit is exposed to moisture, or a foreign object gets into the
enclosure, immediately disconnect the power cord from the
wall. Take the unit to a qualified service person for inspec-
tion and necessary repairs.
Read all the instructions before connecting or operating the component.
Keep this manual so you can refer to these safety instructions.
Heed all warnings and safety information in these instructions and on the
product itself. Follow all operating instructions.
Clean the enclosure only with a dry cloth or a vacuum cleaner.
You must allow 10 cm or 4 inches of unobstructed clearance
around the unit. Do not place the unit on a bed, sofa, rug, or similar
surface that could block the ventilation slots. If the component is placed in
a bookcase or cabinet, there must be ventilation of the cabinet to allow
proper cooling.
Keep the component away from radiators, heat registers, stoves, or any
other appliance that produces heat.
The unit must be connected to a power supply only of the type and voltage
specified on the rear panel of the unit.
Connect the component to the power outlet only with the supplied
power  supply  cable  or  an  exact  equivalent.  Do  not  modify  the
supplied cable in any way. Do not attempt to defeat grounding and/or
polarization provisions. Do not use extension cords.
Do not route the power cord where it will be crushed, pinched, bent at severe
angles, exposed to heat, or damaged in any way. Pay particular attention
to the power cord at the plug and where it exits the back of the unit.
The power cord should be unplugged from the wall outlet if the unit is to
be left unused for a long period of time.
Immediately stop using the component and have it inspected and/or serviced
by a qualified service agency if:                            RC-0 6
CD
MEDIA PLAYER      BALANCE  TAPE  SOURCE  TUNE R  AUX1
STANDBY
•  The power supply cord or plug has been damaged.             PHONES                    PHON O  AUX2
•  Objects have fallen or liquid has been spilled into the unit.
•  The unit has been exposed to rain.
•  The unit shows signs of improper operation
•  The unit has been dropped or damaged in any way
Please use Class 2 Wiring when connecting the speaker terminals of the unit
to ensure proper insulation and minimize the risk of electrical shock.
Place the unit on a fixed, level surface strong enough to
support its weight. Do not place it on a moveable cart that
could tip over.
Rotel products are designed to comply with international di-
rectives on the Restriction of Hazardous Substances (RoHS) in
This symbol means that this unit is double insulated. An earth con-  electrical and electronic equipment and the disposal of Waste
nection is not required.                                Electrical and  Electronic Equipment (WEEE). The crossed
wheelie bin symbol indicates compliance and that the  products
must be appropriately recycled or processed in accordance
with these directives.
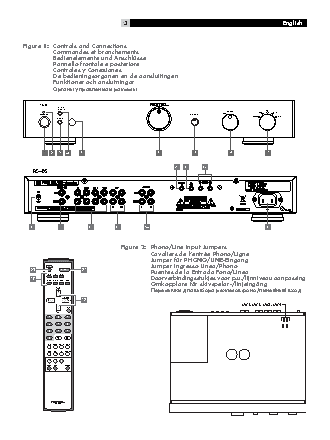
3                                                        English
Figure 1:  Controls and Connections
Commandes et branchements
Bedienelemente und Anschlusse
Pannello frontale e posteriore
Controles y Conexiones
De bedieningsorganen en de aansluitingen
Funktioner och anslutningar
Органы управления и разъемы
RC-06
MEDIA
PLAYER                                                                     CD
SOURCE    TUNER  AUX 1
STANDBY                                                BALANCE    TAPE
PHONO  AUX 2
PHONES
??????? ?                                ?            ?            ?            ?
e r        t
??
0          -         =         q         w                                           y
Figure 2:  Phono/Line Input Jumpers
Cavaliers de l’entree Phono/Ligne
Jumper fur PHONO/LINE-Eingang
Jumper Ingresso Linea/Phono
MUTE
?           POWER  ?                        Puentes de la Entrada Fono/Linea
PHO  CD  TUN
Doorverbindingsstukjes voor p.u./lijnniveau aanpassing
?      AUX 1   AUX 2   TP 1   TP 2
Omkopplare for skivspelar-/linjeingang
VOLUME
Перемычки для выбора режимов фоно/линейный вход
TUNING
?
SW1, SW2, SW3, SW4
T/P
1   2  3
4   5  6
7   8  9
0   10  + 10
MEM  MONO DIRECT  BAND
PTY   TA   TP   DISPLAY
RANDOM
RR-AT94