На сайте 123310 инструкций общим размером 499.06 Гб , которые состоят из 6231583 страниц
Фото

Руководство пользователя VITEK VT-1704. Основные функции, характеристики и условия эксплуатации изложены на 6 страницах документа в pdf формате.
Доступно к просмотру 6 страниц. Рекомендуем вам скачать файл инструкции, поскольку онлайн просмотр документа может сильно отличаться от оригинала.
1704.qxd  22.04.03  17:22  Page 2
OIL  RADIATOR
MANUAL INSTRUCTION
МОДЕЛЬ VT&1704
МАСЛЯНЫЙ ОБОГРЕВАТЕЛЬ
ИНСТРУКЦИЯ ПО ЭКСПЛУАТАЦИИ
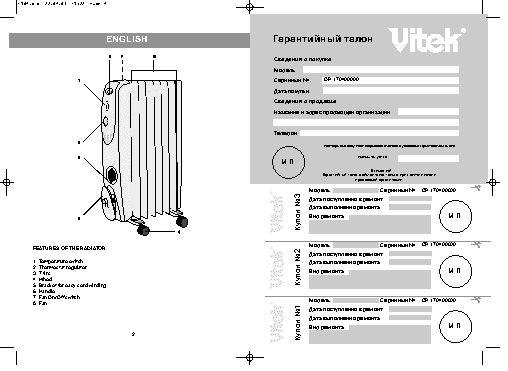
2
Купон №2
Купон №1     8. Fan  Модель:  7. Fan On/Off switch  6. Handle  5. Bracket for easy cord winding  4. Wheel  3. 7 fins  Вид ремонта:  2. Thermostat regulator  Дата выполнения ремонта:  1. Temperature switch  Дата поступления в ремонт:  FEATURES OF THE RADIATOR  Модель:  Купон №3  Модель:  продающей организации  Гарантийный талон действителен только при наличии печати  Внимание!  М.П.  Подпись покупателя  Подтверждаю получение исправного изделия, с условиями гарантии ознакомлен  Телефон:  Название и адрес продающей ор
Вид ремонта:
Вид ремонта:
OR 170400000
Гарантийный талон
Дата выполнения ремонта:
Дата выполнения ремонта:
Дата поступления в ремонт:
Дата поступления в ремонт:
Серийный №:
Серийный №:
Серийный №:
OR 170400000
OR 170400000
OR 170400000
М.П.
М.П.
М.П.
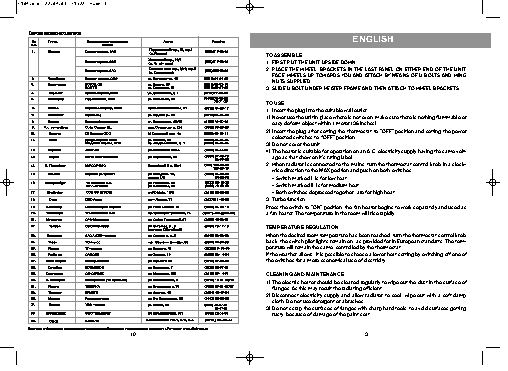
1704.qxd  22.04.03  17:22  Page 6
10
2.
1)
3.
2.
1.
1.
2)
3)
3)
2)
4)
TO USE
TO ASSEMBLE
Turbo function
NUTS SUPPLIED.
Do not cover the unit.
TEMPERATURE REGULATION
CLEANING AND MAINTENANCE
e Switch marked I: is for low heat
age as that show on it's rating label.
selected switches to  “OFF" position.
FIRST PUT THE UNIT UPSIDE DOWN.
e Switch marked II: is for medium heat.
cloth. Do not use detergent or abrasives.
3
Insert the plug into the suitable wall outlet.
rusty, because of damage of the paint coat.
easy deform object within 1 meter (36 inches).
flanges. As this may result the radiating efficient.
the switches for a more economical use of electricity.
ENGLISH
e Both switches depressed together: are for high heat.
a fan heater. The temperature in the room will rise rapidly.
perature will remain the same, controlled by the thermostat.
wise direction to the MAX position and push on both switches:
3. SLIDE U BOLT UNDER HEATER FRAME AND THEN ATTACH TO WHEEL BRACKETS.
PLACE THE WНEEL  BRACKETS IN THE LAST PANEL ON EITHER END OF THE UNIT .
back, the switch pilot lights remain on, as provided for in European standarts. The teme
Disconnect  electricity  supply  and  allow  radiator  to  cool,  wipe  out  with  a  soft  damp
Do not scrap the surfaces of flanges with sharp hard tools, to avoid surfaces getting
If the weather allows, it is possible to choose a lower heat setting by switching off one of
The electric heater should be cleaned regularly to wipe out the dust in the surface of
When the desired room temperature has been reached, turn the thermostat control knob
The heater is suitable for operation on an A.C. electricity supply having the same volte
Insert the plug after setting the thermostat to "OFF" position and setting the power
1) Never use the unit in place where is not even, make sure there is nothing flammable or
FACE WHEELS UP TOWARDS YOU AND ATTACH BY MEANS OF U BOLTS AND WING
Press the switch to "ON" position, the fan heater begins to work separately and used as
When radiator is connected to the mains, turn the thermostat control knob in a clocke