На сайте 123401 инструкция общим размером 499.33 Гб , которые состоят из 6234961 страницы
Фото
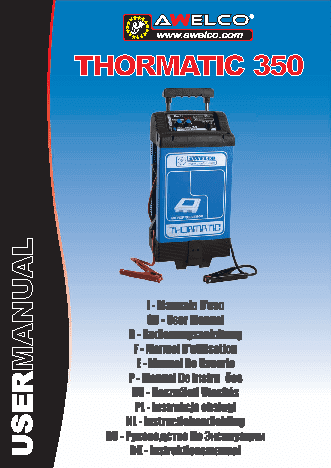
Руководство пользователя AWELCO THORMATIC 350. Основные функции, характеристики и условия эксплуатации изложены на 28 страницах документа в pdf формате.
Доступно к просмотру 24 страницы. Рекомендуем вам скачать файл инструкции, поскольку онлайн просмотр документа может сильно отличаться от оригинала.
I - PREMESSA
Per  garantire la sicurezza e il corretto utilizzo del prodotto, e   ?   PROTEZIONE DALL’INVERSIONE DI POLARITA
necessario leggere attentamente queste istruzioni.        Un collegamento errato della batteria ne impedisce  la  ricarica  e
Eventuali danni provocati da un uso improprio dell’apparecchio non   viene segnalato dal display con scritta “noP”.
sono imputabili al costruttore.                           ?    FUNZIONE ANTI-SHOCK
INSTALLAZIONE                                             Se si aziona il caricabatterie senza connettere alcuna  batteria,  il
Per garantire la massima sicurezza, l’installazione  deve  essere   microcontrollore  non  sente  la  presenza del carico e non eroga
eseguita  come  indicato dal costruttore. Ogni intervento sul   tensione ai morsetti d’uscita, in modo da evitare, in caso di contatto
dispositivo deve essere operato da personale competente  e   tra i morsetti, corto-circuiti indesiderati.
autorizzato, prima del quale e necessario scollegare il  cavo  di   ?   FUNZIONE FINE CARICA
alimentazione e i cavi della batteria. Tolto l’imballaggio, controllare   Quando la batteria ha raggiunto la  tensione  di  fine  carica,  il
l’integrita  dell’apparecchiatura;  in  caso di dubbio non utilizzare e   caricabatteria termina la fase di ricarica e sul display si visualizza
interpellare il fornitore.                                l’indicazione “End”.
I locali dove e effettuata la ricarica di batterie devono  essere   INTERRUZIONE DELLA CARICA
ventilati e la temperatura ambiente deve essere compresa fra 0° C e   La mancanza di alimentazione interrompe la carica e spegne ogni
40° C. Pertanto non ostruire le aperture di ventilazione con  teli  e   led.  Al  ripristino  la  ricarica riprende dal punto in cui era stata
lasciare almeno 5 cm per lato da eventuali pareti.        interrotta.
Il dispositivo deve essere collegato alla rete elettrica  prevista  dai   Per ottenere ricariche migliori, scollegare la batteria solo quando sul
dati di targa. La rete deve essere munita di presa di terra.   display e visualizzata la scritta “End”.
COLLEGAMENTO BATTERIA                                     Se deve essere interrotta la ricarica forzatamente,  spegnere  il
Il caricabatteria e corredato di cavi alla cui estremita v’e un apposito   caricabatterie e poi scollegare i cavi dalla batteria.
connettore per le batterie. Questi e  polarizzato,  pertanto  e   CONSIGLI GENERALI
univocamente determinato il collegamento.                 -   Non scaricare mai completamente la batteria (massimo 80%)
Un collegamento errato non provoca danni alla batteria ma  ne   in modo da allungarne la vita. Mantenere  ben  pulite  da
impedisce la ricarica.                                        ossidazioni le connessioni alla batteria. L’eventuale sostituzione
CARICA SIMULTANEA DI PIU’ BATTERIE                            del cavo di alimentazione deve essere effettuato da personale
Dovendo caricare piu batterie  contemporaneamente  e  possibile   competente ed autorizzato.
collegare  opportunamente  batterie in serie o parallelo. Tra i due   -   Prima di effettuare un avviamento eseguire una carica rapida
sistemi e consigliabile il collegamento in serie in quanto in questo   della durata di qualche minuto.
modo si puo controllare la corrente circolante in ciascuna batteria.   -   Se  l’avviamento non avviene, non insistere, ma attendere
RICARICA DI BATTERIE DI AUTOMOBILI:                           qualche minuto e ripetere la precarica.
1)     Dopo aver disconnesso il morsetto positivo della  batteria   -   Gli avviamenti vanno eseguiti con batteria inserita.
dell’automobile, collegare la pinza rossa  (+)  al  morsetto  positivo   In caso di cattivo funzionamento  del  caricabatteria,  eseguire  le
della  batteria  e, successivamente, la pinza nera (-) al morsetto   seguenti operazioni:
negativo della batteria (il morsetto negativo della batteria e collegato   1)    Controllare le connessioni alla batteria.
alla carrozzeria della macchina).                         2)   Verificare che non sia staccata la spina di alimentazione o un
E’ preferibile prelevare la batteria dal vano dell’automobile.   filo della stessa.
2)     Inserire il cordone di alimentazione nella presa a  230V   3)   Verificare che non sia intervenuto il termostato.
dotata di collegamento a massa.                           Se questi controlli  non  risultano efficaci, contattare un tecnico
3)     Dopo la carica staccare prima l’alimentazione  del   specializzato
caricabatteria, poi rimuovere i collegamenti della batteria.   MANUTENZIONE
Il tempo di carica si puo approssimativamente valutare dividendo la   Il caricabatterie non richiede manutenzione. Per pulizia  ordinaria
capacita, in Amperora, dell’accumulatore, e la corrente di carica I 2.   utilizzare uno straccio umido.
Per esempio per un accumulatore di 80Ah e con I 2=10A, sara: t =   NOTIZIE GENERALI SUI CARICABATTERIA - AVVIATORI
80/10 = 8 h.                                              1)   L'avviatore  e  un  dispositivo  in grado di erogare una forte
FUNZIONI  SPECIALI  DI CARICA (PER I MODELLI CHE LO           corrente per un breve periodo. Pertanto  non  bisogna  mai
PREVEDONO)                                                    insistere molto sugli avviamenti, sia perche  si  rischia  di
-  Usando il commutatore “Battery selection”, scegliere la tipologia   danneggiare il motorino di avviamento sia lo stesso avviatore.
di batteria (lead, lead-calcium o gel). Led appropriati mostrano il   Ogni avviatore indica sempre la corrente massima  che  e  in
tipo di batteria selezionato.                              grado  di erogare pertanto quando si sceglie un avviatore
-  Ruotando la manopola “Capacity”, impostare l’amperora (Ah)   bisogna  verificare  che la corrente massima corrisponda
della batteria che si vuole caricare. Considerare che non  tutti  i   almeno alla corrente di spunto  della  batteria  installata.  Ad
valori possono essere impostati. Se il valore  richiesto  non  puo   esempio se la batteria posta a bordo del veicolo e di 88Ah, la
essere fissato, selezionare il valore vicino piu alto.     sua corrente di spunto (qualora non fosse gia espressamente
FUNZIONI SPECIALI DI AVVIAMENTO (PER I MODELLI CHE LO         indicata) e compresa tra 3 e 3,5 volte la  sua  capacita
PREVEDONO)                                                    nominale, vale a dire tra 260A e 310A.  Per  poter  aiutare  un
?    CONTROLLO DELLA TENSIONE DI AVVIAMENTO                   veicolo all’avviamento e necessario disporre  di  un  avviatore
Quando il dispositivo e nella fase di avviamento, indicata sul display   che possa erogare valori di corrente similari.
con  la  segnalazione  “AUU”,  la tensione di uscita e regolata in   2)   Quando si effettua l’avviamento e sempre necessario lasciare
maniera da proteggere eventuali dispositivi elettronici  connessi   la batteria collegata.
all’alimentazione del motore che si sta avviando.         3)   Non bisogna mai invertire la polarita; qualora si avessero  dei
SEGNALAZIONI SPECIALI                                         dubbi ricordare che il morsetto positivo e piu grosso  e  quello
?    PROTEZIONE TERMICA                                       negativo e collegato alla massa (carrozzeria).
La macchina e protetta contro sovra temperature derivanti dall’uso   4)   Gli  avviamenti  non devono superare i 5 secondi e bisogna
errato  di  batterie.  Nel caso accada tale evento, si visualizza sul   rispettare i cicli d’avviamento indicati sull’apparecchio.
display la scritta “H00“, si accende sul pannello il relativo led  e  si   5)   La corrente di carica della batteria deve  essere  compresa  tra
sospende  la  carica. La ricarica si ripristina automaticamente alla   1/10 e 1/5 della capacita della batteria stessa.
eliminazione della anomalia.                              6)   Nel caso sia necessario prolungare i cavi, si puo allungare il
?    FUNZIONE TAMPONE                                         cordone di alimentazione utilizzando un cavo di pari sezione.
Se  la  batteria  e  lasciata connessa al caricabatteria, lo stesso   7)   Le pinze di collegamento ed  i  morsetti  della  batteria  devono
continua a controllare lo stato di carica e, nel caso in cui vi sia   essere tenuti sempre puliti, come pure il piano della batteria.
necessita, si riattiva.                                   8)   Prima di caricare la batteria, togliere i tappi ed accertarsi che il
liquido elettrolitico copra bene le piastre per 4-5 mm. In caso di
mancanza di liquido aggiungere acqua distillata.          collegata all’alternatore sia tesa e che esso eroghi la corrente
9)   In caso la batteria sia sovente scarica, verificare che la cinghia   giusta.
SIGNIFICATO DELLE SCRITTE E DEI SIMBOLI
U 1 ... V/Hz      Valori nominali della tensione d’alimentazione e della frequenza
U 2 ... V         Valore nominale della tensione a vuoto
I n  ... A        Valore nominale della massima corrente assorbita
I 2 ... A         Valore nominale della corrente di uscita in corrente continua
I 2boost…A        Corrente di avviamento
Cr... Ah          Capacita nominale della piu grande batteria che il caricabatterie puo portare dal 20% al 80% in 15 h
Cmin ... Ah       Capacita nominale della piu piccola batteria che puo essere utilizzata
W                 Simbolo per apparecchi senza controllo automatico di fine carica
P.....w           Potenza assorbita
Simbolo corrente continua
NORME DI SICUREZZA                                        5)   Non esporre alla pioggia o alla neve.
Per  la  sicurezza dell’utente si raccomanda di seguire le seguenti   6)   Le pinze di collegamento ed  i  morsetti  della  batteria  devono
avvertenze:                                               essere tenuti sempre puliti.
1)   Prima di effettuare la carica, leggere attentamente le istruzioni.   7)   Evitare in modo assoluto di invertire la polarita.
2)   Staccare  l’alimentazione,  prima di collegare o scollegare le   8)   Questo caricabatterie comprende parti quali interruttori o rele
connessioni della batteria.                               che possono provocare archi o scintille; pertanto, se usato  in
3)   Durante la carica le batterie emanano gas esplosivi, evitare che   una autorimessa o in un ambiente simile porre il caricabatterie
si formino fiamme e scintille – Prevedere un adeguata     in un locale o in una custodia adatto a questo scopo.
ventilazione durante la carica. Non fumare.           9)   Evitare di ricaricare batterie non ricaricabiili.
4)   Per assicurare la protezione contro i contatti indiretti, collegare   10)   Non tirare i cavi. Non trasportare il caricabatteria sollevandolo
solo ad una appropriata presa munita di messa a terra.    attraverso i cavi.
GB - PREMISE
To  guarantee safety and correct use, is necessary to read these   have: 80/10 = 8 hours charging time.
instructions. Possible damages made by an  improper  use  of  the   SPECIAL  CHARGE FUNCTION (FOR MODELS WHERE
machine are not imputable to the producer.                PROVIDED)
INSTALLATION                                              -  Using the knob “Battery selection”, select the battery type (lead,
To guarantee the maximum safety, the installation must be    gel or lead-calcium; see the battery type label). Appropriate LED
performed as pointed out by the  producer.  Every  intervent  on  the   shows the selected  battery type
device must be done from  competent  and  authorized  employers,   -  By turning the knob “Capacity” set the ampere-hours (Ah) of the
before  you  have  to  disconnect the feeding and the battery cable.   charged battery. Please take into account that not  all  numbers
Removed the packaging, check the machine’s  integrity;  in  case  of   can be set. If the required value cannot be set, select the closest
doubt don’t use and consult the supplier. The places where  the   higher value.
recharge of batteries will effect must be ventilated  and the   SPECIAL  BOOST  FUNCTION  (FOR  MODELS     WHERE
environment  temperature has to be between 0° and 40° C.   PROVIDED)
Therefore don’t obstruct the openings of ventilation with cloths and   ?   BOOST TENSION CONTROL
leave at least 5 cm each side from possible walls. The device has to   When the device is boosting, shown on the display  by  “AUU”,  the
be connected to the electric net as indicated on the data plate. The   output tension is regulated in order to save any electronic circuits
net must be provided of earth plug.                       connected to the engine feed that is going to start.
CONNECTION OF THE BATTERY                                 SPECIAL SIGNALS
The Battery charger is equipped with cables that at the  extremity   ?   THERMAL PROTECTION
have battery connector. It is polarized, reason why the connection is   The car is protected against over-temperature had from the batteries
one-way possible. A wrong connection doesn’t damage the Battery   wrong use. In the case such event happens, it is visualized on the
but prevent the charge.                                   display  the  writing “HOO“ and charge will stop. The recharge is
SIMULTANEOUS CHARGING OF SEVERAL BATTERIES                automatically restored at the elimination of the anomaly.
If you have to charge more than one  battery  simultaneously,  you   ?   BUFFER FUNCTION
can connect them in series or in parallel. Of the two systems, the   If the battery is left connected to the battery charter, it will provides
connection in series is preferable, as in this way you can check the   to assure the correct position of the battery  with  a  periodically
current in each battery.                                  intervent to the tension-state and if is  necessary  to  give  more
CAR BATTERY CHARGE                                        energy.
1.  After to have disconnected the positive terminal of the battery of   ?   INVERSION OF POLARITY PROTECTION
the car, to connect the red clamp (positive) to the positive   A wrong connection of the battery prevents the recharge of it and is
terminal of the battery and, successively, the black  clamp   shown on the display with the writing “noP”.
(negative) to the negative terminal of the battery (the negative   ?   ANTI-SHOCK FUNCTION
terminal of the battery is connected to the vehicle chassis).   If the battery charter is operating without connecting any battery, the
Is preferable to remove the battery from the compartment of the   microcontroller doesn’t recognize the load and it  doesn’t  give  the
car.                                                   tension to the clamps, so that to avoid, in case of  contact  among
2.  Connect  the  primary  cable  to a  socket having on earth   the clamps, an accidental short-circuit.
connection.                                            ?     END CHARGE FUNCTION
3.  After the charge disconnect the battery charger from the feed   When the Battery has the End charge tension, the battery charger
net  and  take off the chassis connection first and after the   stop the charge function, on the display is shown “End”.
battery connections.                                   CHARGE INTERRUPTION
The length of charge can approximately be worked out by deviding   The feeding absence stops the charge and switch off the leds. When
the capacity in amps per hour of the battery by the charge current I 2.   it  is solved, the recharge restart from the point which had been
For instance for a battery of 80Ah capacity and with I 2 = 10A .We   stopped. To get best recharges, disconnect the battery only when on
the display it’s shown the writing “End”. If must forcedly be stopped   indicates  always  the maximum current which is able to deliver
the recharge, switch off the battery charger and then disconnect the   consequently when you choose a  charger  starter  you  must  verify
cables from the battery.                                  that the maximum starting current corresponds to  the  starting
GENERAL RECOMMENDATION                                    current of the battery. For example if the battery  fitted  into  the
-  Do never unload completely the battery (maximum 80%) so that   vehicle  is  an  88Ah  battery its starting current (if it is not already
to lengthen its life. To maintain well cleaned from oxidation the   indicated) is included in a range between 3 and 3,5 times  its
battery connections. The possible change of the  feeding  cable,   nominal capacity, it means between 260A and 310 Ampere. To help
must be done from competent and authorized employers.   start a vehicle it is necessary to have a charger starter capable to
-  Before using the charger as a starter  make  a  quick  charge  of   deliver similar current values.
several  minutes: this limits the starting current and uses less   2)  When you effect starting it is always  necessary  to  leave  the
current from the mains.                                battery connected.
-  If the starting does not succeed, do not insist but wait  a  few   3)  You must never reverse polarity, in case of doubts, remember
minutes before repeating the pre-charge.               that the positive battery terminal is bigger than the negative one and
-  Starting should always be carried out with battery connected.   the negative battery terminal is connected to the vehicle's body.
In case of malfunction, carry out the following :         4)  The starting must not exceed 5 seconds and you must respect
1)  Ensure  that  the  clamps are connected to the correct and   the starting cycles which are indicated on the apparatus.
appropriates terminals ;                                  5)  The charging current of the battery must Ce included between
2)  See that the mains plug is properly connected and wired.   1/10 and 1/5 of its capacity.
3)  Check that the charger-starter’s thermostatic protection has not   6)  In case it is necessary to extend the cables; you can extend the
switched on.                                              primary cable by using a cable having the same section of  the
If problems persists, contact a qualified technician.     primary cable.
SERVICE                                                   7)  The  connecting clamps and the battery terminals must always
The battery charger doesn’t need any service. For ordinary cleaning   be clean like also the battery surface.
use wet rag.                                              8)  Before charging the battery, remove its caps and verify that the
GENERAL INFORMATIONS ABOUT CHARGER - BOOSTERS             electrolytic liquid covers the metal plates  for  at  least  4-5  mm.  In
1 ) The charger starter is a device capable to deliver high current for   Case of electrolytic liquid's lack; add distilled water.
short period of time. Therefore, you must never insist too much on   9)  If the battery is often run-downed, verify if the belt connected to
the  starting  because these are risks to damage either the engine   the alternator is tightened and it delivers the right current.
starter  either  the charger - starter itself. Every charger starter
MEANINGS OF THE SYMBOLS
U 1 ... V/Hz      Frequency and power voltage’s  nominal values
U 2 ... V         No-Load Voltage’s nominal value
I n  ... A        Maximum absorbed power’s nominal value
I 2 ... A         Nominal value of D.C. output current
I 2boost…A        Boost current
Cr... Ah          Nominal capacity of the largest battery that the unit can charge from 20% to 80% in 15 hours.
Cmin ... Ah       Nominal capacity of the smallest battery that can be charged.
W                 Symbol to indicate chargers that have no automatic end of charge control.
P.....w           Absorbed power
Direct current symbol
SAFETY RULES                                              6)  Connecting clamps and battery terminals should always be kept
For the operator’s safety we recommend as follows:        clean.
1)  Before starting the charge, read the instructions carefully.   7)  Absolutely avoid reverting polarities.
2)   Disconnect  power  supply before connecting or disconnecting   8)  This charger-starter features components such  as  switches  or
the connections from the battery.                         relays which can cause electric arcs or sparks;   therefore,  if   the
3)  CAUTION !  Avoid sparks or flames as gases in the vicinity can   device is used in a garage or similar places,  position  the  starter-
be explosive.                                             charger in a safe area   suitable for this purpose.
4)  To  ensure  protection  against indirect contacts, connect the   9)  Attention! Do not recharge unrechargeble batteries.
device only to a socket having an earth connection.       10) Don't to pull cables. Don't to  transport  the  charger  raising  it
5)  Do not set in the rain or snow.                       through cables.
D - EINLEITUNG
Um die Sicherheit und den korrekten Gebrauch zu  garantieren,  ist   und den Lieferanten kontaktieren.
es   notwendig,  folgende  Bedienungsanleitungen  sorgfaltig  Die Raume, in welchen die Batterieaufladung  stattfindet, mussen
durchzulesen. Fur allfallige Schaden, die durch einen ungeeigneten   gut durchluftet und die Raumtemperatur muss zwischen 0° und
Gebrauch  des Apparates verursacht werden, haftet der Hersteller   40°C sein. Demzufolge die Offnungen der Luftung nicht mit Tucher
nicht.                                                    zudecken und mindestens 5cm Abstand auf allen Seiten von  den
INSTALLATION                                              Wanden lassen.
Um die maximale Sicherheit zu garantieren, muss die  Installation   Die  Vorrichtung  muss  an einem elektrischen Netz, wie auf dem
genau so vorgenommen werden, wie vom  Hersteller  angegeben.   Datenschild  vorgesehen,  angeschlossen werden. Das Netz muss
Jeglicher Eingriff auf der Vorrichtung muss durch eine autorisierte   mit der Erdeinfuhrung versehen sein.
Fachperson  vorgenommen werden. Vor dem Eingriff ist es   BATTERIEANSCHLUSS
notwendig zu prufen, dass die Alimentationskabel und die Kabel der   Der Booster ist mit Kabeln ausgerustet, an dessen Enden sich ein
Batterie  nicht  angeschlossen sind. Die Verpackung entfernt, die   Verbinder  speziell  fur Batterien befindet. Dieser ist polarisiert,
Integritat des Gerates kontrollieren, im Zweifelsfalle nicht benutzen   deshalb ist der Anschluss eindeutig festgelegt. Das Gerat nicht dem