На сайте 123387 инструкций общим размером 499.28 Гб , которые состоят из 6234324 страниц
Фото

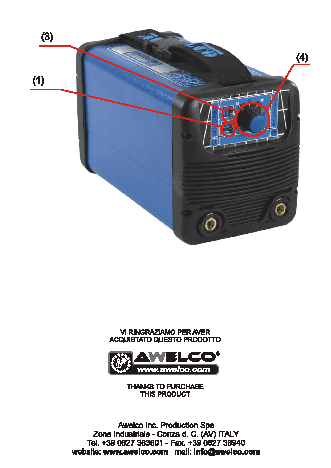
Руководство пользователя AWELCO ONDULIX 130. Основные функции, характеристики и условия эксплуатации изложены на 20 страницах документа в pdf формате.
Доступно к просмотру 12 страниц. Рекомендуем вам скачать файл инструкции, поскольку онлайн просмотр документа может сильно отличаться от оригинала.
ITALIANO
GUIDA ALL’USO: La saldatrice gestisce automaticamente una serie   dall'ossidazione atmosferica  mediante un flusso di gas inerte
di parametri che permettono il buon esito della saldatura:   (normalmente Argon: Ar 99,5) che fuoriesce dall'ugello ceramico.
HOT START (facilita di innesco dell’arco): Nella fase iniziale, in   DISPOSTIVI PER IL FUNZIONAMENTO DELLA MACCHINA
genere, la saldatura e resa difficoltosa dal fatto che l’elettrodo ed il   Allacciamento della saldatrice alle fonti di energia esterne:  La
punto di attacco  sono  freddi. L’apparecchiatura  fornisce in questa   spina del cavo di alimentazione deve essere inserita ad una presa di
fase una corrente di innesco piu elevata per un tempo limitato   alimentazione elettrica monofase con conduttore di terra e protetta
rispetto al valore impostato.  Questo agevola l’accensione  e la   da fusibili o interruttori di  potenza automatici. Sono da evitare
stabilita dell’arco.                                      connessioni con cavi molto lunghi e di sezione ridotta .
ARC FORCE (modulazione della corrente di saldatura): Durante   Uso della saldatrice:  Si  raccomanda di collocare la saldatrice in
la saldatura  l’elettrodo e guidato dalla  mano dell’operatore per cui   posizione ben ventilata, possibilmente in ombra e priva di ostacoli
varia la sua distanza dal piano di saldatura. Per evitare che   che impediscano l’entrata dell’aria dalle alette di raffreddamento; la
l’elettrodo avvicinandosi troppo velocemente alla parte in fusione si   mancanza di ventilazione provoca il surriscaldamento dei
incolli l’apparecchiatura fornisce una corrente piu elevata rispetto a   componenti interni all’apparecchio. Non lasciare l’apparecchio  in
quella impostata per far cessare velocemente il corto circuito.    pieno sole durante la saldatura, non coprire con coperte o altro che
ANTI STICK (rimozione del corto circuito): Se durante la saldatura   possano impedire la ventilazione.
si genera un corto circuito permanente si attiva la funzione di Anti   SALDATURA CON ELETTRODI RIVESTITI - Operazioni
Stick che riduce la corrente di saldatura ad un valore tale da   preliminari:
permettere di rimuovere l’elettrodo dalla condizione di corto circuito   •   Inserire i cavi di saldatura ai morsetti ruotando l’attacco in
nel bagno fuso e riprendere la normale condizione di esercizio.    modo da assicurare una buona  presa; (negativo -  alla
PROTEZIONE TERMICA: quando l’indicatore giallo e acceso non e     pinza di massa e positivo + alla pinza porta elettrodo).
possibile  effettuare  la  saldatura.  L’indicatore  si  spegne  •   Collegare il  cavo  di massa  alla struttura metallica  da
automaticamente quando  l’apparecchio si raffredda e  indica che e   saldare cercando di stabilire un punto di buon contatto tra
possibile ritornare a saldare. All’accensione dell’apparecchio    metallo e pinza
l’indicatore si accende per circa tre secondi e indica che e in corso il   •   Inserire la spina nella presa di corrente dell’impianto.
check dell’elettronica, durante questo tempo non e  possibile   •   Attivare la  macchina posizionando l’interruttore sul  retro
effettuare la saldatura.                                          nella posizione ON.
NO STOP: Selezionando attraverso  l’interruttore la funzione NO   •   Ruotare  il potenziometro di regolazione sul  frontale nella
STOP si attiva un circuito di regolazione ausiliaria e si disattiva la   posizione corrispondente alla corrente di saldatura
manopola di regolazione; e garantita una  maggiore continuita di   desiderata (per la scelta della corrente e dell’elettrodo vedi
saldatura e le migliori caratteristiche d’arco. Selezionando la funzione   tabella).
“Basic MMA” mediante l’interruttore si disattiva la funzione NO STOP   •   Iniziare l’operazione di saldatura coprendosi  il viso con
ed e possibile impostare i parametri appropriati per ogni tipo di   l’apposita maschera.
elettrodo.                                                SALDATURA TIG
TIG: Permette di selezionare il procedimento di saldatura desiderato:   - Innesco: Appoggiare la punta dell' elettrodo sul pezzo, con leggera
•   Posizione MMA per saldare con elettrodo.           pressione. Sollevare l'elettrodo di 2-3 mm con qualche istante di
•   Posizione TIG per saldare in TIG.                  ritardo, ottenendo cosi' l'innesco dell' arco con valore di corrente
La saldatura TIG e un procedimento di saldatura che sfrutta il calore   corrispondente a quello impostato.
prodotto dall'arco elettrico che viene innescato, e mantenuto, tra un   - Per interrompere la saldatura sollevare rapidamente l'elettrodo dal
elettrodo infusibile (Tungsteno) ed il pezzo da saldare. L'elettrodo di   pezzo.
Tungsteno e sostenuto da una torcia adatta a trasmettervi la corrente   Manutenzione: Eventuali riparazioni dovranno essere eseguite solo
di saldatura e proteggere l'elettrodo stesso ed il bagno di saldatura   dai nostri  centri autorizzati, oppure direttamente dalla DITTA
COSTRUTTRICE.
ENGLISH
OPERATING PRINCIPLE:  The  welding machine manages        guaranteed. Selecting the function “BASIC MMA” through the switch,
automatically various parameters that allow  a good result of  the   the “NO STOP” function is deactivated and it is possible to set the
welding operation:                                        parameters that are suitable for every kind of electrode.
HOT START:Generally when we start welding operation  we have   TIG: used to select the desired welding procedure:
some difficulties because electrode and working piece are cold.   •   MMA position for welding with electrode.
During  this phase the equipment supplies (for a small time) the   •   TIG-LIFT position for TIG welding.
starting current with a value higher than value planed. This helps the   TIG welding is a welding procedure that exploits the heat produced
arc ignition and makes more stable welding process.       by the electric  arc that  is struck,  and  maintained, between a non-
ARC FORCE:During welding operations the electrode is guided by   consumable electrode (tungsten) and the piece to be welded. The
the operator's hand, therefore the distance from the welding point is   tungsten electrode is supported by a torch suitable for transmitting
not always  the same.  To avoid that electrode approaching  the   the welding current to it and protecting the electrode itself and the
welding  melt  creates a short circuit  ,the electronic equipment   weld pool from atmospheric oxidation, by  the flow of an  inert gas
automatically increases the arc current value to eliminate that.    (usually argon: Ar 99.5) which flows out of the ceramic nozzle.
ANTI-STICK: If during welding process we have a permanent short
circuit, immediately the current  value decreases until  the value to   MACHINE FUNCTIONING CONTROL DEVICE - CONNECTION OF
allow to the electrode be removed from the melt and welding process   THE WELDING MACHINE TO EXTERNAL POWER SOURCES:
can proceed regularly.                                    Power supply: The plug of the power cord must be connected to a
THERMAL PROTECTION: when yellow led is ignited is not possible   safe power source, single-phase + PE protection conductor. Power
to carry out the welding. Signal light is switch off automatically when   source  must be protected by automatic switches or  fuses. It is
temperature goes down , now  it  is possible to weld  again.  When   necessary to avoid connection with long cables and in any case their
equipment is switch on, signal remains about 3 seconds switched on.   section  must  me equal or higher of section of the power cord of
During this time there is a check of all electronic functions and it is   machine. The equipment must be connected to the electrical net by
impossible to operate.                                    mean of suitable switch. It  must be protected against overloads  (
NO STOP: Selecting the “NO STOP” function through the switch the   switches protected by fuses, circuit breakers,earth leakage circuit
auxiliary regulation circuit is activated and the regulation knob does   breakers). The wiring is to be carried out by qualified personnel only
not work. So a better welding continuity and arc features are   (electricians).
Use of the welding  machine:  It is  recommended to place the   •   Start the welding operation after protecting your face with a
machine in a well-ventilated area, possibly in the shade and free from   suitable mask.
obstacles that  may avoid the air intake  through  the cooling fans.   TIG WELDING
Absence of ventilation causes the overheating of the internal   -  Strike: Place the tip of  the electrode on the piece, using slight
components. Do not  leave the equipment under the sun during   pressure. Lift the electrode up 2-3mm with a brief delay,  thus
welding operations, do not cover it with blankets or other  material   obtaining arc strike with the current value corresponding to that of the
that may prevent air from circulating.                    setting.
WELDING BY MEANS OF COATED ELECTRODES - Preliminary       - To interrupt welding, lift the electrode quickly away from the piece.
operations:                                               Maintenance: When necessary, repairs must be carried out by our
•   Fit the welding cables to the shunt terminals (negative - to   authorised Service Centres, or directly by the Manufacturer through
the earth gun and positive + to the electrode gun).    its own Customer Service.
•   Connect the earth cable to the metal frame to be welded,
trying to create a good contact between metal and gun.
•   Connect plug of power cord to the power source.
•   Switch on the machine, positioning switch in position ON.
•   Rotate trimming potentiometer on  the front to  the desired
welding current (see the table to select the current and the
electrode).
DEUTSCH
GEBRAUCHSANWEISUNG:              Die         wesentlichen  Sicherungen oder Leistungsschutzautomaten. Zu vermeiden sind
Vorzugseigenschaften dieser Schwei?maschine sind :        Verbindungen  mit  sehr langen Kabeln geringen Querschnitts.Das
LEICHTES ZUNDEN DES LICHTBOGENS (HOT START) :Bei der      Gerat wird mittels einer Trenn- und Unterbrechungsvorrichtung mit
anfanglichen Phase ist die Schwei?ung normalerweise schwierig,   Uberlastschutz  (Schutzschalter  oder  Schmelzsicherung  und
weil die Elektrode und die Anschwei?stelle kalt sind.Das Gerat liefert   differentieller Schalter) durch das Verteilungsnetz des Nutzers
bei dieser Phase eine hohere Zundspannung und einen um 10 Amp.   gespeist.Der Anschlu? und die Verlegung der Speisungsanlage fur
starkeren Strom im Gegensatz zum eingestellten Strom.     die Schwei?maschine hat  durch spezialisiertes Fachpersonal
SCHWEI?STROM- MODULATION (ARC FORCE) :Beim Schwei?en      (Elektriker).
wird die Elektrode von der Hand des Nutzers gefuhrt, weshalb deren   Schwei?maschinengebrauch:   Es  wird  nahegelegt,  die
Abstand  von der Schwei?stelle nicht  immer gleich  ist. Das   Schwei?maschine an einer gut belufteten Stelle und  moglichst  im
elektronische Gerat andert deshalb automatisch und gleichma?ig   Schatten aufzustellen, wo keine Hindernisse den Lufteinla? durch die
den   Lichtbogenstromwert  und   halt  den   thermischen  Kuhlrippen verhindern ; bei  mangelnder Luftung werden die
Schmelzungsproze? gleich, damit eine Schwei?ung bester Qualitat   Innenteile des Gerats durch Uberhitzung beschadigt und sind nicht
erfolgt.                                                  mehr zu reparieren.Das Gerat beim Schwei?en nicht in praller Sonne
ABSCHALTUNG          DES        STROMES         WEGEN     stehen lassen, nicht mit Decken oder ahnlichem abdecken, damit die
ELEKTRODENSCHWEI?UNG (ANTI-STICK): Bei dieser Situation   Beluftung nicht behindert wird.
hat das Gerat einen Kurzschlu? und gibt deshalb automatisch nach   SCHWEI?EN MIT MANTELELEKTRODEN - Vorbereitungen:
10 Sekunden keinen Strom mehr ab.                             •   Die Schwei?kabel in die Abzweigklemmen stecken (minus -
SCHUTZ    THERMAL:    Leuchtende   Anzeige  welche   die         zur Erdungsklemme und plus + zur Elektrodenzange), Die
Uberschreitung der  maximalen Temperatur, welche vom  Gerat      Elektrode gewunschten Durchmessers, die fur die
erlaubt ist, anzeigt. Falls die Anzeige aufleuchtet ist das Schweissen   vorgesehene Schwei?ung geeignet ist, an der Zange
nicht moglich. Die Anzeige loscht automatisch, wenn sich das Gerat   anbringen.
abkuhlt und anzeigt, dass das Schweissen wieder moglich ist. Bei   •   Das Erdungskabel  mit der zu schwei?enden Struktur
Inbetriebnahme des  Gerates  leuchtet die Anzeige fur  circa 3   verbinden und moglichst eine gute Kontaktstelle zwischen
Sekunden auf und zeigt, dass ein Check der Elektronik im Gange ist.   Metall und Zange finden, Das Gerat in Betrieb setzen indem
In dieser Zeit ist es nicht moglich zu Schweissen                der Knopf auf der Ruckseite in der Positon  ON  gebracht
NO STOP: Wahlt man mit dem Schalter die Funktion NO STOP, wird   wird., Das Einstellungspotentiometer auf der Vorderseite in
der Hilfs-Stromkreis aktiviert und der Einstellungs-Drehknopf arbeitet   die Stellung des gewunschten Schwei?stromes drehen (zur
nicht.  Werden nun eine bessere Kontiunitat beim Schwei?en und   Strom- und Elektrodenwahl siehe nachstehende Tabelle.
bessere  Lichtbogeneigenschaften  garantiert. Wahlt man mit  dem   •   Die Gesichtsschutzmaske aufsetzen und  mit  dem
Schalter die Funktion "BASIC MMA" wird die NOSTOP  Funktion      Schwei?en beginnen. Der Lichtbogen la?t  sich leichter
entaktiviert und es ist  moglich, die Parameter einzustellen, die fur   zunden, wenn man die Elektrode leicht an der zu
jede Elektrodenart verwendbar sind.                              schwei?enden Stelle reibt. Wenn der Lichtbogen gezundet
WIG: Zur Auswahl des gewunschten Schwei?verfahrens:              ist, die Elektrode ein wenig vom gebildeten Schmelzbad
•   Stellung MMA zum Schwei?en mit Elektrode.                 anheben, etwas geneigt halten und gleichma?ig langs der
•   Stellung WIG zum WIG-Schwei?en.                           Schwei?linie vorschreiten.
Das  WIG-Schwei?en ist ein Verfahren, das  die vom elektrischen   WIG-SCHWEISSEN
Lichtbogen ausgehende Warme nutzt. Der Bogen wird gezundet und   -  Zundung: Die Elektrodenspitze  mit leichtem Druck auf dem
aufrechterhalten zwischen  einer nicht abschmelzenden Elektrode   Werkstuck aufsetzen. Die Elektrode  mit einigen Augenblicken
(Wolfram) und dem Werkstuck. Die Wolframelektrode wird von einem   Verzogerung um 2-3 mm anheben, soda? der Lichtbogen mit dem
Brenner gehalten, der geeignet ist, den Schwei?strom zu ubertragen   eingestellten Stromwert gezundet wird.
und die Elektrode ebenso wie das Schwei?bad  durch  Inertgas   -Um den Schwei?vorgang zu unterbrechen, wird die Elektrode rasch
(normalerweise Argon: Ar 99,5), das aus der Keramikduse austritt,   vom Werkstuck abgehoben.
vor der atmospharischen Oxidation zu schutzen.            Wartung: Eventuelle Reparaturen durfen nur von  unseren
ANSCHLUSS DER SCHWEISSMASCHINE AN DIE EXTERNEN            autorisierten  Zentren  als  Beauftragte  oder  direkt  von
ENERGIEQUELLEN - Stromspeisung: Das Hauptversorgungskabel   HERSTELLERFIRMA    mittels  des    Kundendienstzentrums
muss   an  einem   elektrischen  einphasigem  Stecker  mit  durchgefuhrt werden.
Erdungsstecker angeschlossen werden und funktioniert  mit
FRANCAIS
GUIE POUR L’USAGE:  Le poste permet la gestion de plusieurs   DISPOSITIVES POUR LE FONCTIONEMMENT DE LA MACHINE
parametres que permettent de souder facilement :          BRANCHEMENT DE LA SOUDEUSE AUX SOURCES D'ENERGIE
HOT START ( facilite l’amorcage de l’arc): La premiere phase de   EXTERNES ALIMENTATION DE L'ENERGIE ELECTRIQUE:  La
la soudure est souvent difficile en raison du fait que l'electrode et le   fiche du cable d’alimentation doit etre connectee dans une prise du
point de soudure sont froids. Pendant cette phase, le poste fournit   reseau monophase avec connexion a la terre et protege avec des
une tension d'amorcage plus elevee pour un bref periode. Ca facilite   fusibles ou  interrupteurs automatiques. Evitez les branchements
l’amorcage et la stabilite de l’arc.                      avec des cables tres longs et d'une section reduite. La soudeuse doit
ARC FORCE  (modulation du  courant de soudage):  Pendant la   etre alimentee par le reseau de distribution de l'utilisateur a travers
soudure l’electrode est guide par la  main du  soudeur et donc sa   un dispositif de sectionnement et de coupure adequat, equipe d'une
distance du bain de soudage il peut varier. Pour eviter que l’electrode   protection contre les surcharges (interrupteur automatique, fusibles
en s’approchant trop rapidement au bain de fusion puisse se coller   ou interrupteur differentiel).  Le branchement et  la pose de
Micro fournie un courant plus eleve par rapport a celle programme   l'installation electrique destinee a l'alimentation de la soudeuse
pour faire cesser rapidement le court circuit.            doivent etre effectuees par un electricien specialise et competent.
ANTI-STICK ( elimination du court circuit): Si pendant la soudure   UTILISATION DE LA SOUDEUSE: Il est recommande d'installer la
on cree court circuit permanent, poste a souderactive la  fonction   soudeuse dans un endroit bien ventile, a l'ombre, si possible, et sans
Anti-Stick. Cette fonction permet de reduire le courant a une valeur   aucun obstacle qui empecherait la penetration de l'air par les ailettes
aussi bas de rendre possible le detachement de l’electrode du bain   de refroidissement. L'absence de ventilation provoque la surchauffe
de fusion et recommencer a travailler normalement.        des composants internes et donc des degats irreparables.Ne laissez
PROTECTION THERMIQUE: Le temoin lumineux jaune signale que   pas la soudeuse en plein soleil et ne la couvrez pas pour ne pas
la temperature a depasse la valeur maxime. Quand caoccurrent on   empecher la ventilation.
peut pas travailler ! Le temoin s’eteigne de facon automatique quand   SOUDURE AVEC ELECTRODES REVETUES -  Operations
la temperature descend a la valeur plus bas de la valeur maxime.   preliminaires:
Quand  le poste est mis en marche le temoin s’allume pour 3   •   Branchez les cables de soudure aux bornes de derivation
secondes et fait le cheque de l’electronique, pendant ce temps on ne   (negatif - a la pince de masse et positif + a la pince porte
peut pas souder                                                  electrode).
NO STOP: Choisissant  la fonction de "NO STOP" par le         •   Branchez le cable de  masse a la structure  metallique a
commutateur le circuit reglementaire auxiliaire est active et le bouton   souder en essayant d'etablir un bon point de contact entre
reglementaire ne fonctionne pas. Meilleure continuite de soudure et   le metal et la pince.
des dispositifs d'arc sont garantis. Choisissant la fonction le "BASIC   •   Mettre en marche le poste pressant l’interrupteur en position
MMA" par le commutateur la fonction de "NO STOP" est  mis hors   ON.
tension et il est possible de placer les parametres qui conviennent a   •   Tourner  la  poignee du potentiometre de reglage sur la
chaque genre d'electrode.                                        valeur du courant desire (pour le choix du courant voir la
TIG: Permet de selectionner le procede de soudage necessaire:    table).
•   Position MMA pour soudage avec electrode.              •   Protegez votre visage avec le  masque special et
•   Position TIG pour soudage en TIG.                         commencez la soudure.
Le soudage TIG est un procede de soudage utilisant la chaleur   SOUDAGE TIG
produite par l'arc electrique, lequel est amorce et maintenu entre une   -Amorcage: Poser la pointe de l'electrode sur la piece en exercant
electrode infusible (tungstene) et la piece a souder. L'electrode au   une legere pression. Soulever l'electrode de 2-3 mm avec quelques
tungstene est supportee par une torche prevue pour lui transmettre   instants de retard, entrainant ainsi l'amorcage de l'arc avec une
le courant de soudage et proteger l'electrode et le bain de soudage   valeur de courant correspondant a la valeur configuree.
de l'oxydation atmospherique au  moyen d'un flux de gaz inerte   -Pour interrompre le soudage, soulever rapidement l'electrode de la
(generalement de l'Argon: Ar 99,5) en sortie de la buse en   piece.
ceramique.                                                Entretien: La soudeuse ne requiert aucun entretien. Adressez-vous
a un atelier agree pour les reparations eventuelles ou directement a
la Societe Productrice.
ESPANOL
GUIA AL USO: El soldador hace todos los controles posibles para   cuando el aparato regresa a su temperatura normal de trabajo y solo
que el usuario haga una buena soldadura.                  entonces se puede soldar. Cuando se conecta el aparato esa luz se
HOT START Facilidad de encendimiento del arco:  En la fase   enciende durante 3 segundos, revelando un control de los circuitos
inicial, generalmente la soldadura se vuelve dificil por el hecho que   electronicos y en ese tiempo no es posible soldar.
el electrodo y el punto de conexion estan frios. El aparato preve en   NO STOP: Seleccionando  la  funcion de “NO STOP” a  traves del
esta fase, una tension de encendimiento mas alta y un suplemento   interruptor se activa el circuito de regla auxiliar y el boton de regla no
de corriente superior con respecto al valor impuesto.     trabaja. Tan se garantizan una mejor continuidad de la soldadura y
ARC FORCE Modulacion de la corriente de soldadura: Durante la   las caracteristicas del arco. Seleccionando la funcion desactivan al
soldadura, el electrodo es guiado por la mano del operador por lo   “Basic MMA” a traves del interruptor, la funcion de “NO STOP” y es
cual, su distancia desde el punto de soldadura no resulta siempre en   posible fijar los parametros que son convenientes para cada clase de
la distancia justa. La maquinaria electronica modifica, por lo tanto, en   electrodo.
manera  automatica  y linear,  el valor de  la corriente de  arco   TIG: permite seleccionar el procedimiento de soldadura deseado:
manteniendo constante el proceso termico de  fusion  del electrodo   •   Posicion MMA para soldar con electrodo.
para el beneficio de la buena soldadura.                      •   Posicion TIG-LIFT para soldar en TIG.
ANTI STICK Separacion de  la corriente causada por la     La soldadura TIG es un procedimiento de soldadura que aprovecha
soldadura del electrodo: Durante la soldadura puede succeder que   el calor producido por el arco electrico que se ceba, y se mantiene,
el electrodo se pegue a la superficie a soldar y para evitar que se   entre un electrodo  infusible (tunsgteno) y  la  pieza a soldar. El
cree un corto circuito se genera una corriente tal, que libra al   electrodo de tungsteno esta sostenido por un soplete adecuado para
electrodo desde esa condicion.                            transmitir la corriente de soldadura y proteger el mismo electrodo y el
AMPARO TERMICO: O indicador luminoso  amarillo revela  que  la   bano de soldadura de la oxidacion atmosferica mediante un flujo de
temperatura del aparato salio mas que la deseada. Cuando esa luz   gas  inerte (normalmente argon: Ar 99,5) que sale de la  boquilla
esta encendida, no se puede soldar. Se apaga automaticamente   ceramica.