На сайте 126961 инструкция общим размером 514.1 Гб , которые состоят из 6425520 страниц
Фото
Руководство пользователя HYUNDAI H-1547. Основные функции, характеристики и условия эксплуатации изложены на 13 страницах документа в pdf формате.
Доступно к просмотру 12 страниц. Рекомендуем вам скачать файл инструкции, поскольку онлайн просмотр документа может сильно отличаться от оригинала.
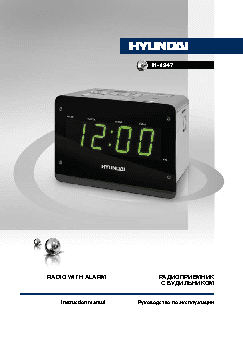
H-1547
RADIO WITH ALARM                        РАДИОПРИЕМНИК
С БУДИЛЬНИКОМ
Instruction manual          Руководство по эксплуатации
Instruction manual                                                                                                        Instruction manual
Dear customer!
Thank you for purchasing our product. For safety, it is strongly recommended to read
this manual carefully before connecting, operating and/or adjusting the product and keep
the manual for reference in future.
Description
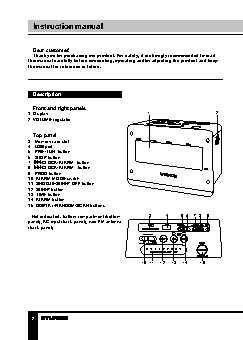
Front and right panels
1. Display                                 1                        2
2. VOLUME regulator
Top panel
3.  Memory card slot
4.  USB port
5.  PRE./TUN. button
6.  STOP button
7.    /CLOCK/ALARM- button
8.    /CLOCK/ALARM+ button
9.  PROG button
10. ALARM MODE switch
11. SNOOZE/SLEEP OFF button
12. SLEEP button
13. TIME button
14. ALARM button
15. DISPLAY/RANDOM/SCAN buttons
Not indicated: battery compartment (bottom   3   4    5 6  7 8  9
panel), AC input (back panel), wire FM antenna
(back panel)
10  11  12  13  14   15
2                                                                                                                                                  3
Instruction manual                                Instruction manual
Important safeguards              check that voltage indicated on the rating label
corresponds to the mains voltage in your home.
•  Plug the corresponding end of cord into
•  The instruction manual contains important   the power socket on the rear of the set.
operating and maintenance instructions. For   •  Insert the plug into power supply.
your safety, it is necessary to refer the manual.
Keep the manual for use in future.
•  Do not hit or drop the unit.     Setting the clock
•  Do not expose the unit to vibration,
direct sunlight, too high or low temperature or
humidity.                             Set ALARM MODE switch to BUZZER
•  If you are not going to use the unit within   position. Press and hold TIME button until
a long period of time, remove the batteries to   hour digits flash. Press repeatedly   /CLOCK/
avoid their leakage.                ALARM- and   /CLOCK/ALARM+ buttons to
•  Do not disassemble the unit yourselves.   set hours. Press TIME button to save hours;
Refer servicing to qualified service personnel.  minute digits will flash. Press repeatedly
/CLOCK/ALARM- and   /CLOCK/ALARM+
buttons to set minutes. Press and hold TIME
button to save minutes.
Power supply
Battery operation                   Radio operation
•  Insert 1 battery Cr2032 (included) to the
battery compartment (remove the screw). The   Tuner operations
set will not work normally from the battery   •  Set ALARM MODE switch to RADIO
supply, but there is now the advantage that, in   position; the Radio indicator on the display will
case there is a mains current failure, your clock   light up.
will continue to work. The clock display will not   •  Press TIME button to switch on the radio.
light up, the clock time will be held in the clock   •  Press RANDOM/SCAN button once to
memory by the battery back-up system. This   begin searching and saving of up to 40 radio
enables you to move the set from place to place   stations automatically.
without re-setting the clock every time. The   •  Briefly press   /CLOCK/ALARM- button
battery back-up system is only meant to be used   or   /CLOCK/ALARM+ button to select
from short temporary power failures. For longer   previous or next preset station.
durations the battery may become exhausted or   •  Press and hold for 3 seconds   /CLOCK/
there may be deviation in accuracy.  ALARM- button or   /CLOCK/ALARM+ button
•  When the battery is exhausted, it should   for automatical search of the nearest station
be removed from the set to prevent leakage.   with strong signal down or up the range.
If you do not wish to take advantage of the   •  Press PRE./TUN. button to switch between
battery back-up system, your set will work   radio frequency and preset position; when
normally without a battery. However, if   frequency is displayed you can tune stations
disconnected from the mains, the clock figures   manually with   /CLOCK/ALARM- and   /
will flash when the mains are re-connected and   CLOCK/ALARM+ buttons.
you must re-set the clock.            •  To save a station, press and hold PROG
button until display blinks, press   /CLOCK/
AС operation                      ALARM- button or   /CLOCK/ALARM+ button
•  Before the first connecting of the appliance   to change preset position, briefly press PROG
2                                                                          3