На сайте 123418 инструкций общим размером 499.4 Гб , которые состоят из 6235582 страниц
Фото
Руководство пользователя TAMRON SP AF 10-24mm f/3.5-4.5 Di II LD Aspherical (IF) Canon EF-S. Основные функции, характеристики и условия эксплуатации изложены на 6 страницах документа в pdf формате.
Доступно к просмотру 4 страницы. Рекомендуем вам скачать файл инструкции, поскольку онлайн просмотр документа может сильно отличаться от оригинала.
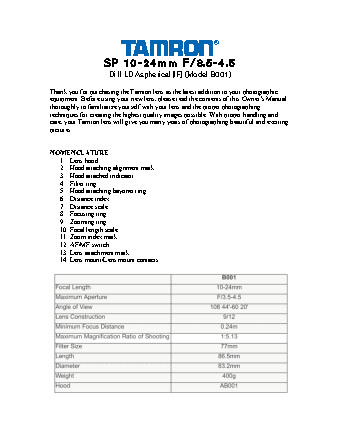
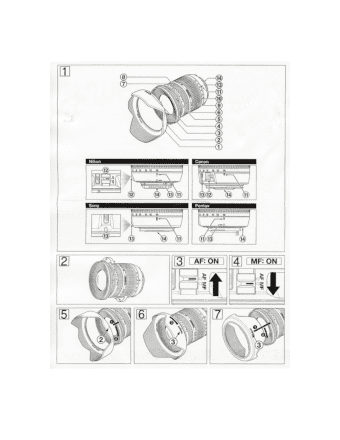
R
SP 10-24mm F/3.5-4.5
Di II LD Aspherical [IF] (Model B001)
Thank you for purchasing the Tamron lens as the latest addition to your photographic
equipment. Before using your new lens, please read the contents of this Owner’s Manual
thoroughly to familiarize yourself with your lens and the proper photographing
techniques for creating the highest quality images possible. With proper handling and
care, your Tamron lens will give you many years of photographing beautiful and exciting
pictures.
NOMENCLATURE
1.  Lens hood
2.  Hood attaching alignment mark
3.  Hood attached indicator
4.  Filter ring
5.  Hood attaching bayonet ring
6.  Distance index
7.  Distance scale
8.  Focusing ring
9.  Zooming ring
10. Focal length scale
11. Zoom index mark
12. AF/MF switch
13. Lens attachment mark
14. Lens mount/Lens mount contacts
ATTACHING AND REMOVING THE LENS
* How to mount the lens
Remove the rear cap of the lens. Align the lens attachment mark on the lens barrel with
its counterpart on the camera mount and insert the lens. Rotate the lens clockwise (in case
of Nikon lens, counter-clockwise) until it click-locks.
* How to detach the lens
Pressing the lens release button on the camera down, turn the lens counter-clockwise (in
case of Nikon lens, clockwise), and lift the lens off the camera’s lens mount.
*The image circles of Di-II lenses are designed to match the digital SLR cameras using
the image sensors equivalent to APS-C (approx. 15.5x23.2mm). Do not use Di-II lenses
with cameras using image sensors larger than APS-C. Using Di-II lenses with such
cameras may cause vignetting on the image.
*Some Canon cameras have index marks for attaching both EF lenses (red circle) and
EF-S lenses (white square). To attach or remove Di-II lenses, align the lens attachment
mark on the lens with the index mark for EF lenses (red circle). Do not forcibly align the
lens attachment mark with the index mark for EF-S lens (white square). Doing so could
result in damage to the lens and/or camera.
*For further details, please read the instruction manual of your camera.
FOCUSING (AUTOFOCUS)
In case of Sony or Pentax, switch the focusing mode switch of the camera to Auto
focusing mode (AF). In case of a Nikon or Canon camera, switch the AF/MF swotch on
the lens to AF. In case of Nikon camera with the focus mode selector dial, set the focus
mode to “S” or “C”, and then set the AF/MF switch on the lens side to “AF”. Press the
shutter button lightly while viewing through the camera’s viewfinder, the lens focuses
automatically. An in-focus mark will light when lens focuses on the main subject sharply.
Press the shutter button further to photograph.
*When set on AF mode, interfering with the focusing ring may cause serious damage to
the lens mechanism.
*The distance scale is marked for guidance purposes. The actual point may slightly differ
from the distance marked on the focal length index.
*For further details, please read the instruction manual of your camera.
FOCUSING (MANUAL FOCUS)
In case of Sony or Pentax, switch the focusing ring mode switch of the camera to manual
focusing mode (MF). In case of a Nikon or Canon camera, switch the AF/MF switch on
the lens to MF. (Fig 4). In case of Nikon camera with the focus mode selector dial, set the
focus mode to “M”, and then set the AF/MF switch on the lens side to “MF”. Focus by
manually rotating the focusing ring while viewing through the camera’s viewfinder. The
main subject in the viewfinder will be sharp when the lens is focused correctly.
*Even in the MF mode while turning the focusing ring while pressing the shutter button
halfway, the focus aid function lamp lights up when the picture is in focus.
*At infinity, make sure the image in the viewfinder appears sharp. The infinity position
on the B001 is made with certain allowances to insure proper focus under a variety of
conditions.
*For further details, please read the instruction manual of your camera.
ZOOMING
Rotate the zooming ring of the lens while viewing through the camera’s viewfinder and
compose your image at the chosen focal length.
LENS APERTURE AND AE MODE
Please follow the instruction manual of your camera.
LENS HOOD
A bayonet-type lens hood is provided as standard equipment. We recommend shooting
with the hood attached whenever possible as the lens hood eliminates stray light which is
harmful to the picture. However, please be aware of the “PRECAUTIONS IN
SHOOTING” when your camera is equipped with a built-in-flash.
Attaching the Lens Hood (Fig 5 & 6)
Align the hood attaching alignment mark (2) on the hood with the corresponding hood
attaching bayonet ring (5) (or the top of the index line of the distance scale) on the lens.
Press the hood lightly onto the hood attaching bayonet ring and then rotate it clockwise to
secure. The lens hood will be securely held as the mark “TAMRON O” comes to the top.
*Pay particular attention to align the hood attaching indexes when using zoom lenses
including wide-angle (ex: 35mm or wider) settings. Improper attachment of a hood for
wide-angle zoom lenses may cause large shadowed areas in your pictures.
Stowing the Lens Hood on the Lens (Fig 7)
Reverse the lens hood. Point the lens toward the opening, then align the hood attachment
mark on the lens with the “TAMRON O” alignment on the hood.
Turn the hood clockwise until the alignment mark is at the top to set it. (Fig 7)
PRECAUTIONS IN SHOOTING
-The optical design for Di-II takes into consideration the various features of digital single
reflex cameras. However, due to the configuration of the digital single reflex cameras,
even when the auto focus accuracy is within specifications, the focal point may be a little
forward or behind the optimum point when shooting with auto focus under some
conditions.
-When photographing near the minimum focusing distance it is advisable to shoot at
higher f-numbers to obtain sharper image quality.