На сайте 123475 инструкций общим размером 499.56 Гб , которые состоят из 6237619 страниц
Фото
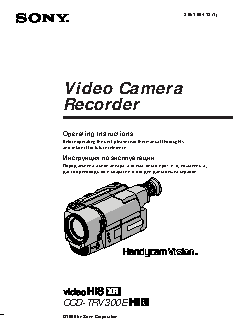


Руководство пользователя SONY CCD-TRV300E. Основные функции, характеристики и условия эксплуатации изложены на 136 страницах документа в pdf формате.
Доступно к просмотру 136 страниц. Рекомендуем вам скачать файл инструкции, поскольку онлайн просмотр документа может сильно отличаться от оригинала.
3-861-894-13 (1)
Video Camera
Recorder
Operating Instructions
Before operating the unit, please read this manual thoroughly,
and retain it for future reference.
Иino?oeoeя ii yenieoaoaoee
Пa?aa yenieoaoaoeae aiia?aoa aieiaoaeuii i?i?oeoa, ii?aeoenoa,
aaiiia ?oeiaianoai e nio?aiяeoa aai aeя aaeuiaeoeo ni?aaie.
CCD-TRV300E
©1998 by Sony Corporation
English                               Рonneee
Welcome!                              Дia?i ii?aeiaaou!
Congratulations on your purchase of this Sony  Пica?aaeяai Вan n i?eia?aoaieai aaiiie
HandycamVision™ camcorder. With your  aeaaieaia?u Handycam Vision™ oe?iu Sony.
Handycam Vision you can capture life’s precious  С iiiiuu? Вaoae aeaaieaia?u Handycam
moments with superior picture and sound  Vision Вu nii?aoa caia?aoeaou ai?iaea Вai
quality.                              iaiiaaieя ?ecie n i?aainoiaiui ea?anoaii
Your Handycam Vision is loaded with advanced  ecia?a?aieя e caoea.
features, but at the same time it is very easy to  Вaoa aeaaieaia?a Handycam Vision
use. You will soon be producing home video that  iniauaia oniaa?oainoaiaaiiuie
you can enjoy for years to come.      ooieoeяie, ii a oi ?a a?aiя aa i?aiu eaaei
eniieuciaaou. Вnei?a Вu aoaaoa nicaaaaou
naiaeiua aeaaii?ia?aiiu, eioi?uie
WARNING                  ii?aoa ianea?aaounя iineaao?uea aiau.
To prevent fire or shock hazard, do not expose
the unit to rain or moisture.
To avoid electrical shock, do not open the  ПРЕДУПРЕЖДЕНИЕ
cabinet.                              Дeя i?aaioa?auaieя aicai?aieя eee
Refer servicing to qualified personnel only.  iianiinoe yeaeo?e?aneiai oaa?a ia
aunoaaeяeoa aiia?ao ia ai?au eee aeaao.
Вi ecaa?aiea ii?a?aieя yeaeo?e?aneei
NOTICE ON THE SUPPLIED AC POWER        oieii ia ioe?uaaeoa ei?ion.
ADAPTOR FOR CUSTOMERS IN THE           Зa ianeo?eaaieai ia?auaounя oieuei e
UNITED KINGDOM                         eaaeeoeoe?iaaiiiio ianeo?eaa?uaio
A moulded plug complying with BS1363 is fitted  ia?niiaeo.
to this equipment for your safety and
convenience.
Should the fuse in the plug supplied need to
be replaced, a 5 AMP fuse approved by ASTA
or BSI to BS1362 (i.e., marked with 2 or @
mark) must be used.
If the plug supplied with this equipment has
a detachable fuse cover, be sure to attach the
fuse cover after you change the fuse. Never
use the plug without the fuse cover. If you
should lose the fuse cover, please contact
your nearest Sony service station.
2
English
Table of contents
Before you begin                      – for manual adjustment –
Using this manual................................................... 5  Selecting automatic/manual adjustment
Checking supplied accessories ............................. 6  modes ..................................................................... 61
Focusing manually ............................................... 63
Getting started                       Using the PROGRAM AE function .................... 65
Installing and charging the battery pack ............ 7  About the PROGRAM AE function ................ 65
Inserting a cassette ............................................... 12  Using the aperture priority mode ................... 66
Using the shutter priority mode ...................... 67
Basic operations                       Using the twilight mode ................................... 69
Camera recording ................................................. 13  Using manual mode ............................................. 70
Using the zoom feature ..................................... 15  Using slow shutter................................................ 73
Selecting the START/STOP mode .................. 17  Tips for manual adjustment ................................ 74
Shooting with the LCD screen ......................... 18  Shooting with backlighting ................................. 76
Letting the subject monitor the shot (Mirror  Adjusting the brightness of the picture ............. 77
mode) ................................................................... 19  Adjusting the white balance ............................... 78
Hints for better shooting ..................................... 20
Checking the recorded picture ........................... 22  – for playback/editing –
Playing back a tape ............................................... 24  Watching on a TV screen ..................................... 82
Searching for the end of the picture ................... 29  Enjoying digital effect during playback ............ 84
Searching the boundaries of recorded date ...... 85
Advanced operations                   Returning to a pre-registered position .............. 87
Using alternative power sources ........................ 30  Locating the marking position............................ 88
Using the mains ................................................. 30  Writing the RC Time code on a recorded tape ... 93
Changing the mode settings ............................... 32  Editing onto another tape .................................... 95
– for camera recording –              Additional information
Using the FADER function.................................. 38  Changing the lithium battery in the
Photo recording .................................................... 41  camcorder ........................................................... 96
Using the wide mode function ........................... 43  Resetting the date and time................................. 98
Superimposing a still picture on a moving  Simple setting of clock by time difference ........ 99
picture.................................................................. 45  Usable cassettes and playback modes ............. 100
Recording still pictures successively ................. 46  Tips for using the battery pack ......................... 102
Replacing a brighter portion of a still picture  Maintenance information and precautions..... 106
with a moving picture ....................................... 47  Using your camcorder abroad .......................... 112
Adding an incidental image to pictures ............ 49  Trouble check ...................................................... 113
Adding an old movie type atmosphere to   Self-diagnosis display ........................................ 121
pictures ................................................................ 50  Specifications ....................................................... 123
Enjoying picture effect ......................................... 51  Identifying the parts ........................................... 125
Superimposing a title ........................................... 53  Warning indicators ............................................. 135
Making your own titles ....................................... 55  Index ........................................................ Back cover
Re-recording a picture in the middle of a
recorded tape ...................................................... 56
Recording with the date/time ............................ 58
Optimizing the recording condition .................. 59
Releasing the STEADY SHOT function ............. 60
3