На сайте 126957 инструкций общим размером 514.09 Гб , которые состоят из 6425490 страниц
Фото
Руководство пользователя TRIPP LITE PDUMH32HVNET. Основные функции, характеристики и условия эксплуатации изложены на 32 страницах документа в pdf формате.
Доступно к просмотру 32 страницы. Рекомендуем вам скачать файл инструкции, поскольку онлайн просмотр документа может сильно отличаться от оригинала.
Warranty          Owner’s Manual
chance to win a FREE Tripp Lite
Registration
Register online today for a
product! www.tripplite.com/warranty
PDUMH30NET
120V, 50/60Hz Input and Output
PDUMH30HVNET/PDUMH30HV19NET/
PDUMH32HVNET
208/230V, 50/60Hz Input and Output
Switched Rack PDU
Important Safety Instructions                    2
Installation                                     3
Configuration and Operation                      7
Features                                         7
Technical Support                                9
Warranty and Warranty Registration              10
Espanol                                         11
Francais                                        21
1111 W. 35th Street • Chicago, IL 60609 USA
www.tripplite.com/support
Copyright © 2011 Tripp Lite. All rights reserved.
1
201105095 93-3048.indb   1                                      6/15/2011   3:07:21 PM
Important Safety Instructions
SAVE THESE INSTRUCTIONS
This manual contains instructions and warnings that should
be followed during the installation, operation, and storage
of this product. Failure to heed these instructions and
warnings will void the product warranty.
• The PDU provides convenient multiple outlets, but it DOES NOT provide surge or
line noise protection for connected equipment.
• The PDU is designed for indoor use only in a controlled environment away from
excess moisture, temperature extremes, conductive contaminants, dust or direct
sunlight.
• Do not connect the PDU to an ungrounded outlet or to extension cords or adapters
that eliminate the connection to ground.
• The power requirement for each piece of equipment connected to the PDU must
not exceed the individual outlet’s load rating.
• The total power requirement for equipment connected to the PDU must not exceed
the maximum load rating for the PDU.
• Do not drill into or attempt to open any part of the PDU housing. There are no user-
serviceable parts inside.
• Do not attempt to modify the PDU, including the input plugs and power cables.
• Do not attempt to use the PDU if any part of it becomes damaged.
• Do not attempt to mount the PDU to an insecure or unstable surface.
• Never attempt to install electrical equipment during a thunderstorm.
• Use of this equipment in life support applications where failure of this equipment
can reasonably be expected to cause the failure of the life support equipment or to
significantly affect its safety or effectiveness is not recommended. Do not use this
equipment in the presence of a flammable anesthetic mixture with air, oxygen or
nitrous oxide.
•  Operate the PDU at indoor temperatures between 32 degrees F and 104 degrees F
(between 0 degrees F and 40 degrees C) only.
•  Provide adequate protection against excess currents, short circuits and ground
faults in accordance with local and national electrical codes, such as NEC in the
US.
•  The main socket outlet that supplies the PDU should be near the PDU and easily
accessible.
2
201105095 93-3048.indb   2                                      6/15/2011   3:07:21 PM
Installation
Mounting the PDU
Caution! Before mounting the PDU, ensure that a compatible, easily
accessible and properly grounded AC outlet is available in the location.
The PDU supports two mounting configurations: 2U Rack and Under-Counter.
Note: Regardless of configuration, the user must determine the fitness of hardware and procedures before
mounting. The PDU and included hardware are designed for common rack and rack enclosure types and may
not be appropriate for all applications. Exact mounting configurations may vary. Screws for attaching the
mounting brackets and cord retention shelf to the PDU are included. Use only the screws supplied by the
manufacturer, or their exact equivalent (#8-32, 3/8” flat head screw for mounting bracket, #6-32, 1/4” flat
head screws for cord retention shelf).
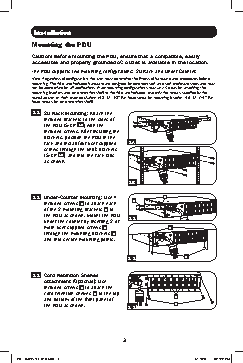
1-1 2U Rack Mounting: Attach the
included brackets to the sides of
the PDU (STEP  1A ) with the
included screws. After installing the
brackets, position the PDU in the
rack and install four user-supplied   1A
screws through the unit's brackets
(STEP  1B ) and into the rack rails
as shown.
1B
1-2 Under-Counter Mounting: Use 4   A          B
included screws  A  to attach each
of the 2 mounting brackets  B  to
the PDU as shown. Mount the PDU   1-2
under the counter by inserting 2 or
more user-supplied screws  C                 D
through the mounting brackets  D
and into secure mounting points.
1-2                  C
1-3 Cord Retention Shelves
Attachment (Optional): Use
included screws  A  to attach the
cord retention shelves  B  to the top          B
and bottom of the front panel of
the PDU as shown.             1-3              A
3
201105095 93-3048.indb   3                                      6/15/2011   3:07:22 PM