На сайте 123390 инструкций общим размером 499.31 Гб , которые состоят из 6234587 страниц
Фото
Руководство пользователя LENOVO V510z (10NH0015RU). Основные функции, характеристики и условия эксплуатации изложены на 62 страницах документа в pdf формате.
Доступно к просмотру 62 страницы. Рекомендуем вам скачать файл инструкции, поскольку онлайн просмотр документа может сильно отличаться от оригинала.
V510z
User Guide and
Hardware Maintenance Manual
Machine Type (MT):
10NH, 10NJ, 10NQ
Energy Star MT:
10NH, 10NJ, 10NQ
Overview                           Computer locks                      Specifications
Locations of indicators,           Locking devices to                  Specifications of your
connectors, and                    keep your computer                  computer
controls provided on               safe
your computer
Replaceable parts                  Replacing CRUs                      Replacing FRUs
Locations of the                   Replacing instructions              Replacing instructions
replaceable parts on               for customer-                       for field-replaceable
your computer                      replaceable units                   units (FRUs) (for
(CRUs)                              technicians only)
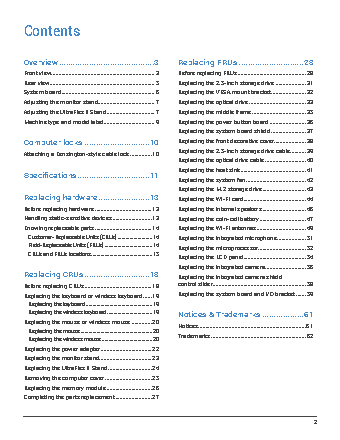
Contents
Overview .........................................3    Replacing FRUs ............................28
Front view .......................................................................3  Before replacing FRUs ...............................................28
Rear view ........................................................................5  Replacing the 2.5-inch storage drive .....................31
System board ................................................................6  Replacing the VESA mount bracket ........................32
Adjusting the monitor stand.......................................7  Replacing the optical drive .......................................33
Adjusting the UltraFlex II Stand .................................7  Replacing the middle frame .....................................35
Machine type and model label ...................................9  Replacing the power button board .........................36
Replacing the system board shield ........................37
Computer locks ............................10          Replacing the front decorative cover......................38
Attaching a Kensington-style cable lock ...............10  Replacing the 2.5-inch storage drive cable...........39
Replacing the optical drive cable ............................40
Specifications ...............................11       Replacing the heat sink  .............................................41
Replacing the system fan .........................................42
Replacing the M.2 storage drive ..............................43
Replacing hardware ......................13            Replacing the Wi-Fi card ...........................................44
Before replacing hardware .......................................13  Replacing the internal speakers ..............................46
Handling static-sensitive devices ...........................13  Replacing the coin-cell battery ................................47
Knowing replaceable parts .......................................14  Replacing the Wi-Fi antennas  ..................................49
Customer-Replaceable Units (CRUs) ..........................14  Replacing the integrated microphone  ....................51
Field-Replaceable Units (FRUs) ....................................14  Replacing the microprocessor  .................................52
CRUs and FRUs locations ..............................................15
Replacing the LCD panel  ...........................................54
Replacing the integrated camera ............................56
Replacing CRUs ............................18          Replacing the integrated camera shield
Before replacing CRUs ..............................................18  control slider ................................................................58
Replacing the keyboard or wireless keyboard ......19   Replacing the system board and I/O bracket .......59
Replacing the keyboard ..................................................19
Replacing the wireless keyboard ..................................19  Notices & Trademarks ..................61
Replacing the mouse or wireless mouse ..............20  Notices..........................................................................61
Replacing the mouse ......................................................20
Replacing the wireless mouse ......................................20  Trademarks .................................................................62
Replacing the power adapter ...................................22
Replacing the monitor stand ....................................23
Replacing the UltraFlex II Stand ..............................24
Removing the computer cover ................................25
Replacing the memory module ...............................26
Completing the parts replacement .........................27
2
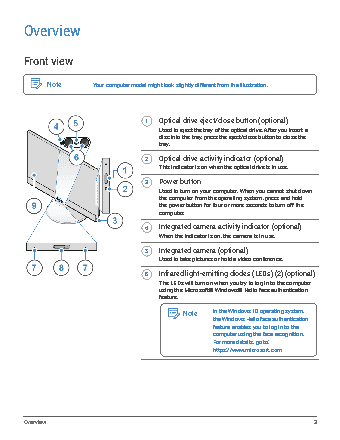
Overview
Front view
Note            Your computer model might look slightly different from the illustration.
1    Optical drive eject/close button (optional)
Used to eject the tray of the optical drive. After you insert a
disc into the tray, press the eject/close button to close the
tray.
2    Optical drive activity indicator (optional)
This indicator is on when the optical drive is in use.
3    Power button
Used to turn on your computer. When you cannot shut down
the computer from the operating system, press and hold
the power button for four or more seconds to turn off the
computer.
4    Integrated camera activity indicator (optional)
When the indicator is on, the camera is in use.
5    Integrated camera (optional)
Used to take pictures or hold a video conference.
6    Infrared light-emitting diodes (LEDs) (2) (optional)
The LEDs will turn on when you try to log in to the computer
using the Microsoft® Windows® Hello face authentication
feature.
Note       In the Windows 10 operating system,
the Windows Hello face authentication
feature enables you to log in to the
computer using the face recognition.
For more details, go to:
https://www.microsoft.com
Overview                                                                                                3